
WingBones Whisker Fairings — Support & Install Guide
Flexible 2.4GHz antenna protection for RC gliders. Made in U.S.A.
WingBones Whisker Fairings protect the receiver antennas that must run outside a plane’s fuselage. Most commonly, pilots must mount antennas externally when using 2.4GHz with carbon fiber fuselages.
These fairings are designed to be extremely durable, holding antennas in the proper position securely in flight, yet they will flex while under the abuse of landings, pilot handling, and plane storage.

Install video — coming soon. A full step-by-step video will be posted on the WingBones YouTube channel. Check back here for the link, or visit youtube.com/@wingbones.
What’s in your kit


Both the Starter Kit (1 pair) and Fleet Kit (3 pairs) include the same tools — only the number of fairing pairs and the amount of heat shrink differ.
| Item | Starter | Fleet | What it’s for |
|---|---|---|---|
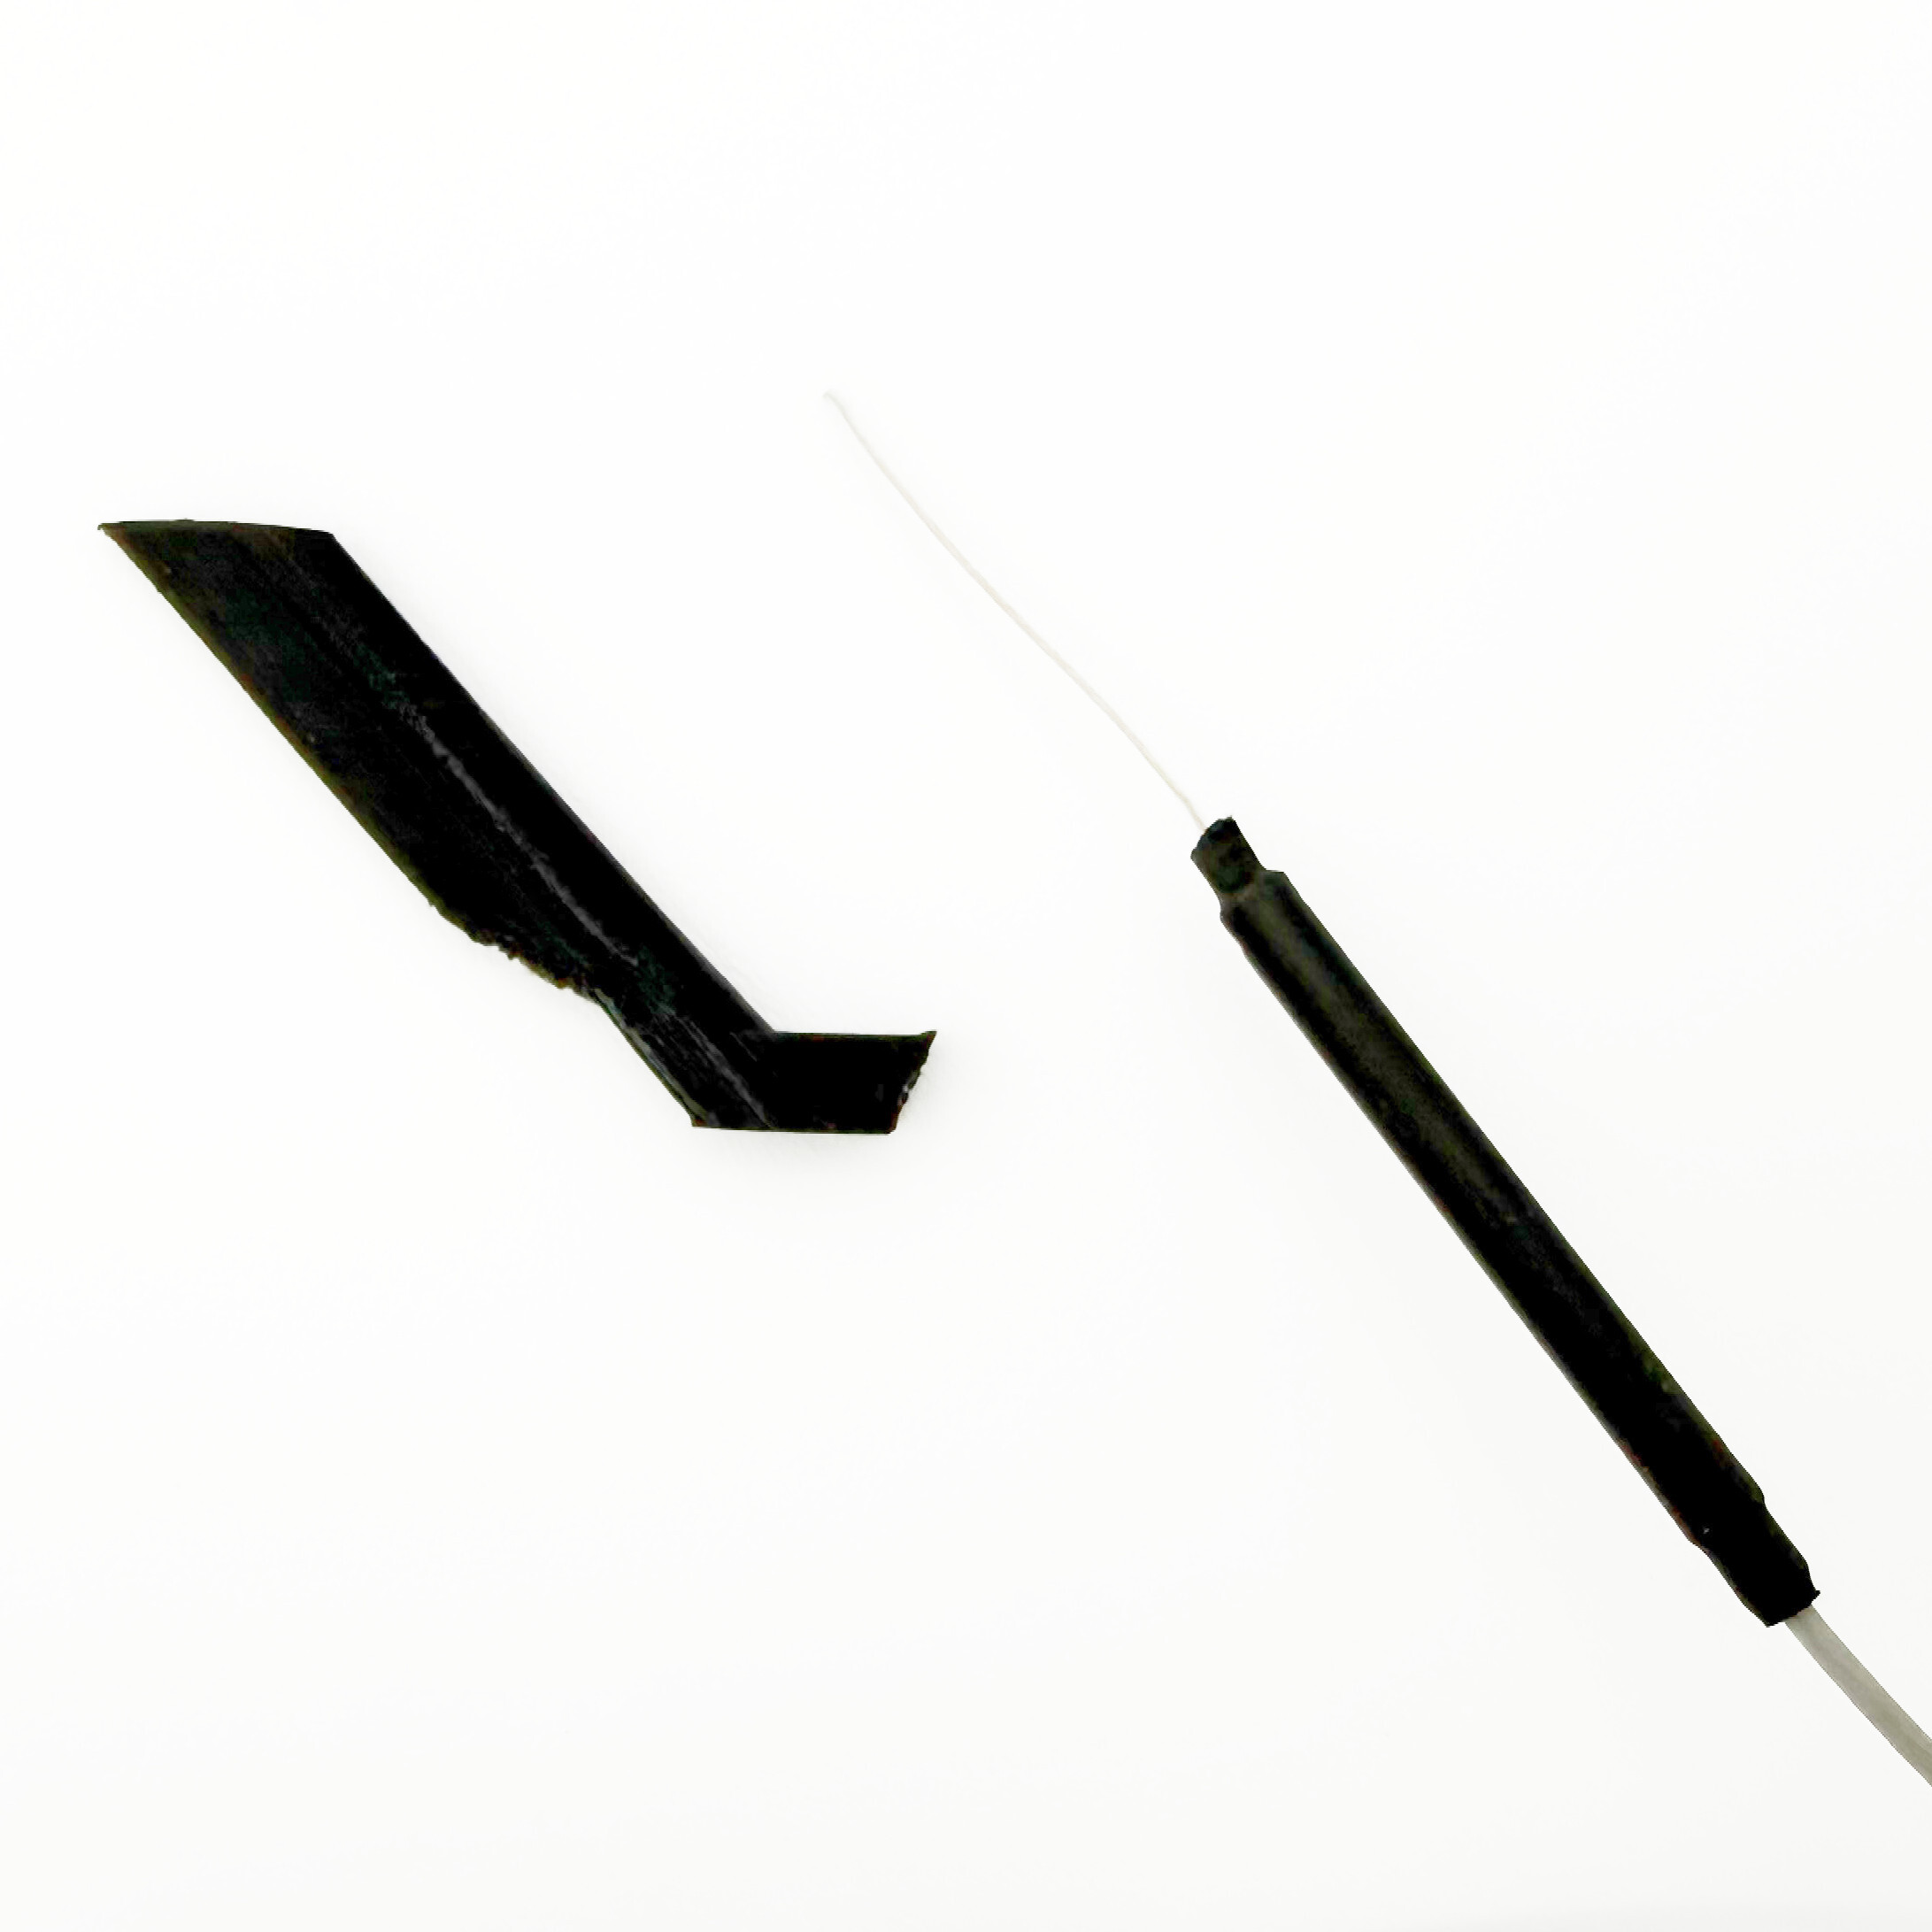
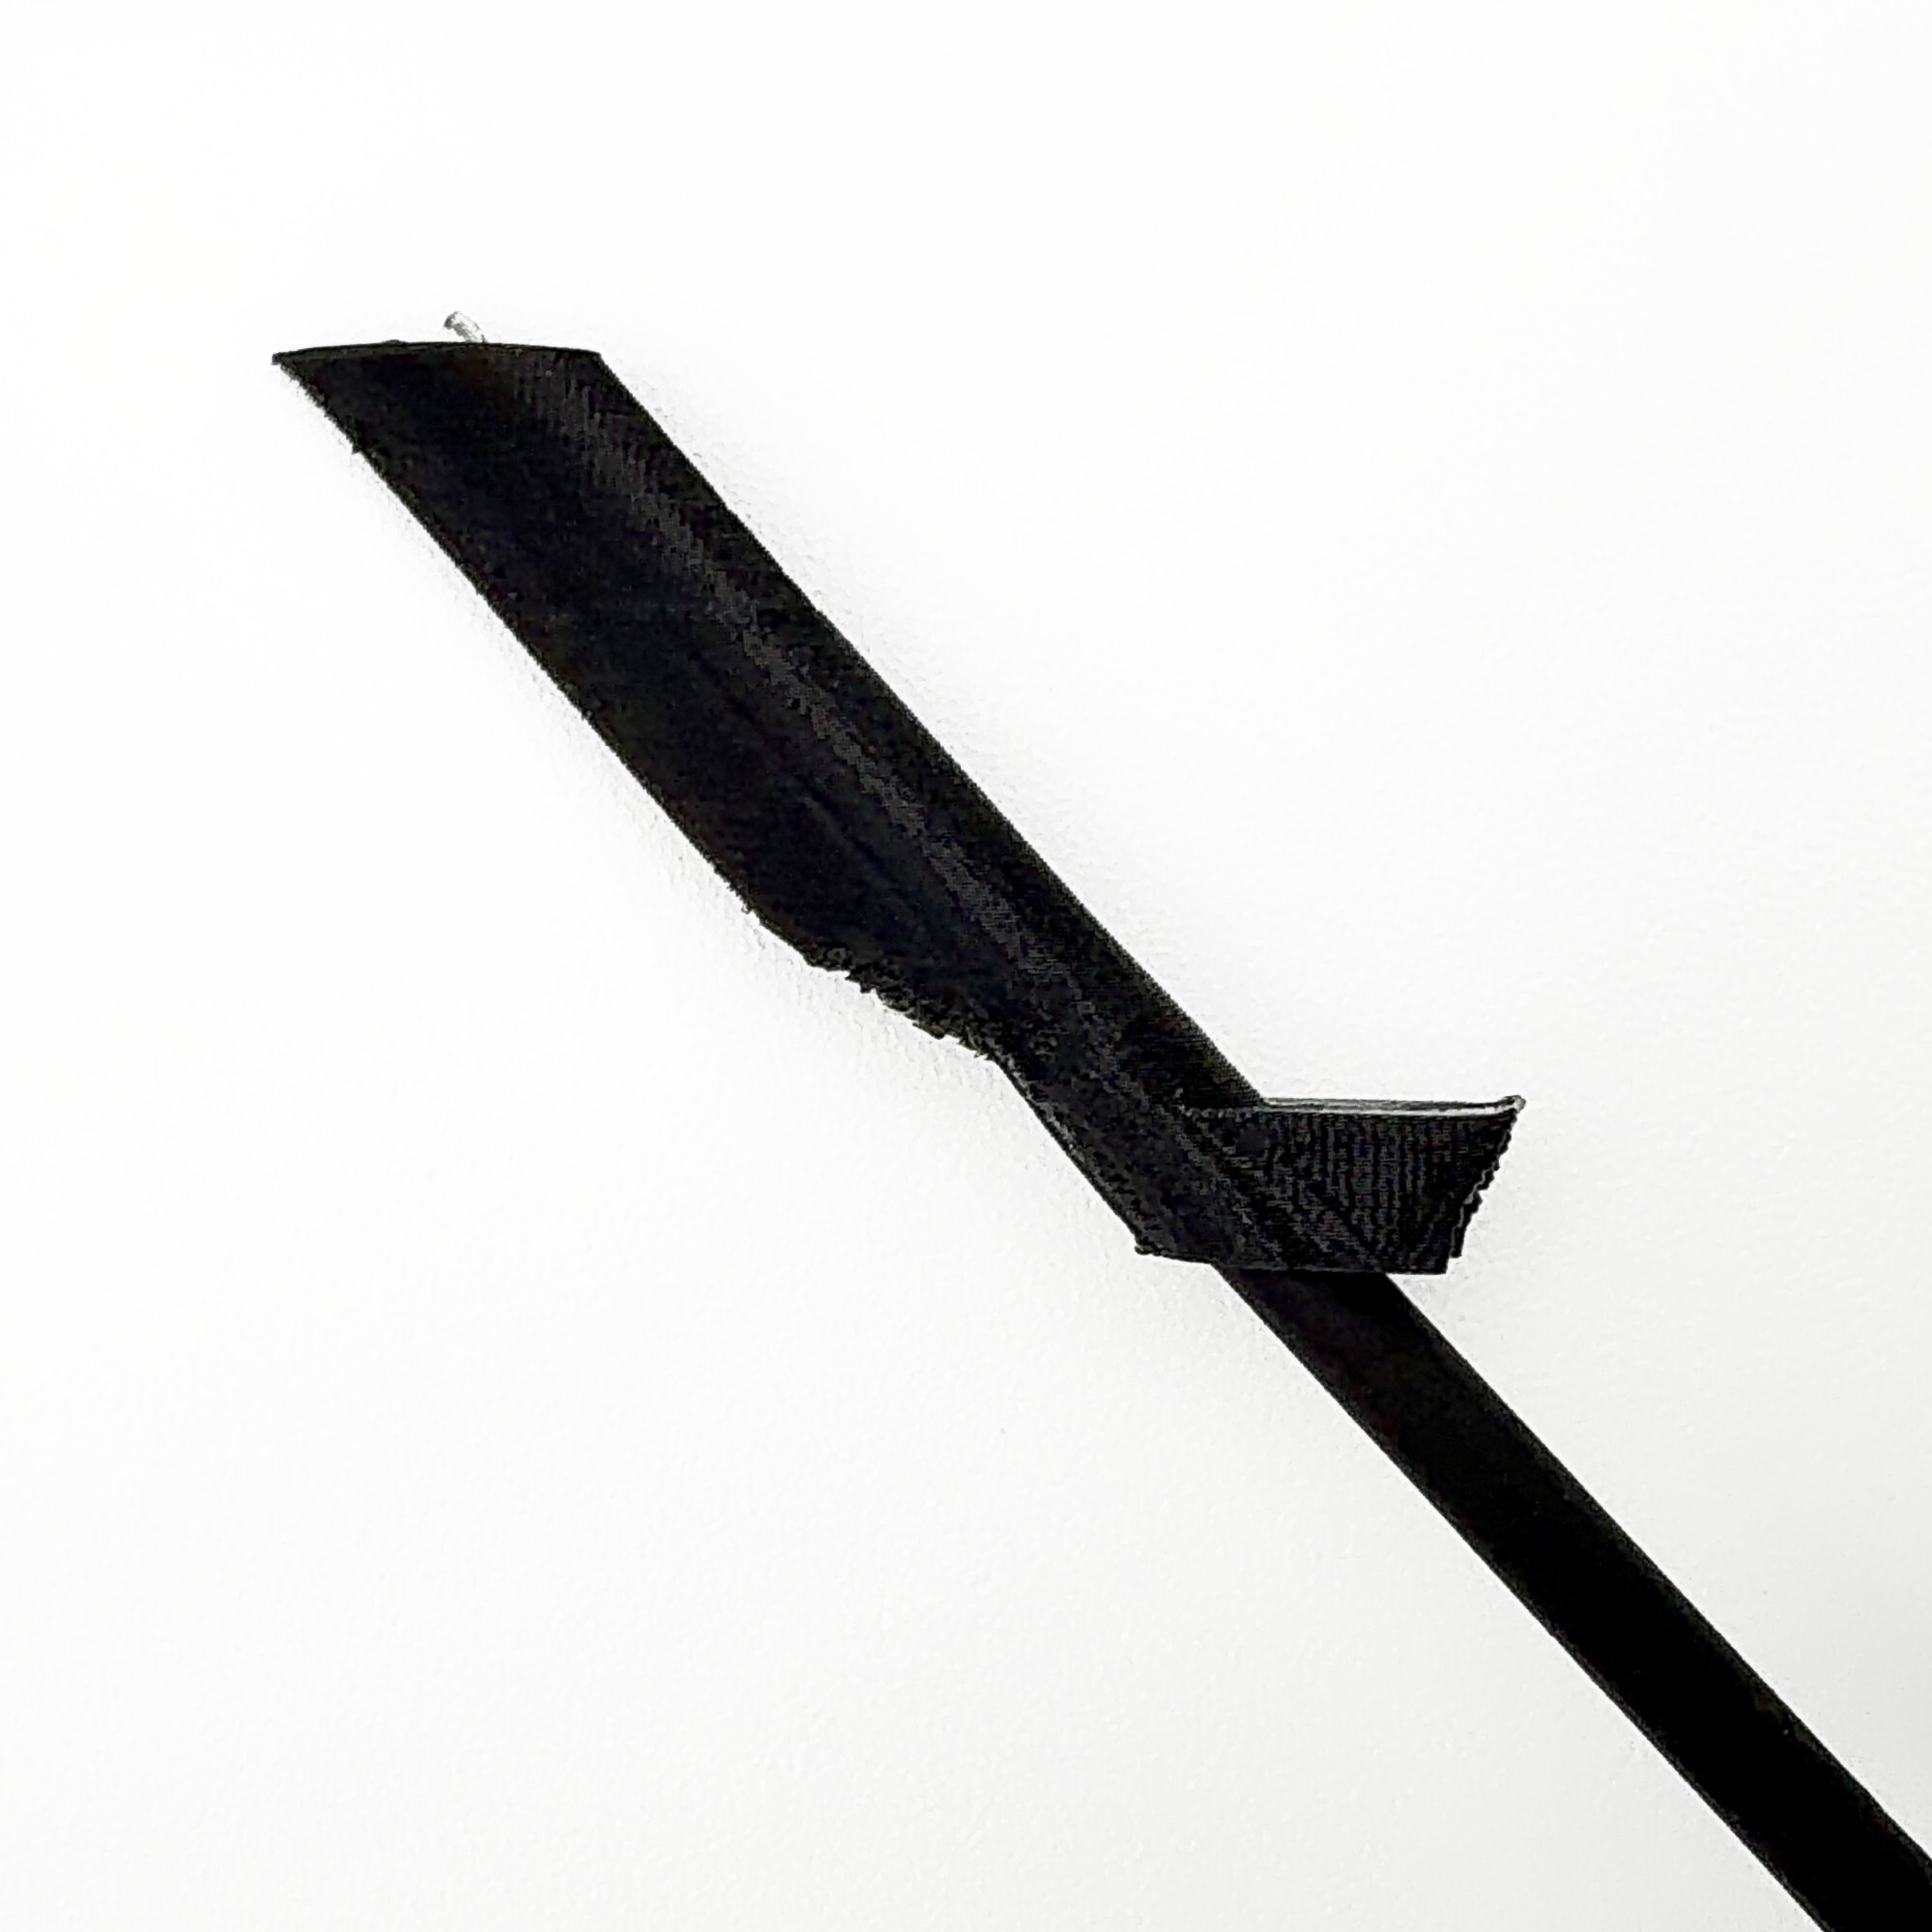
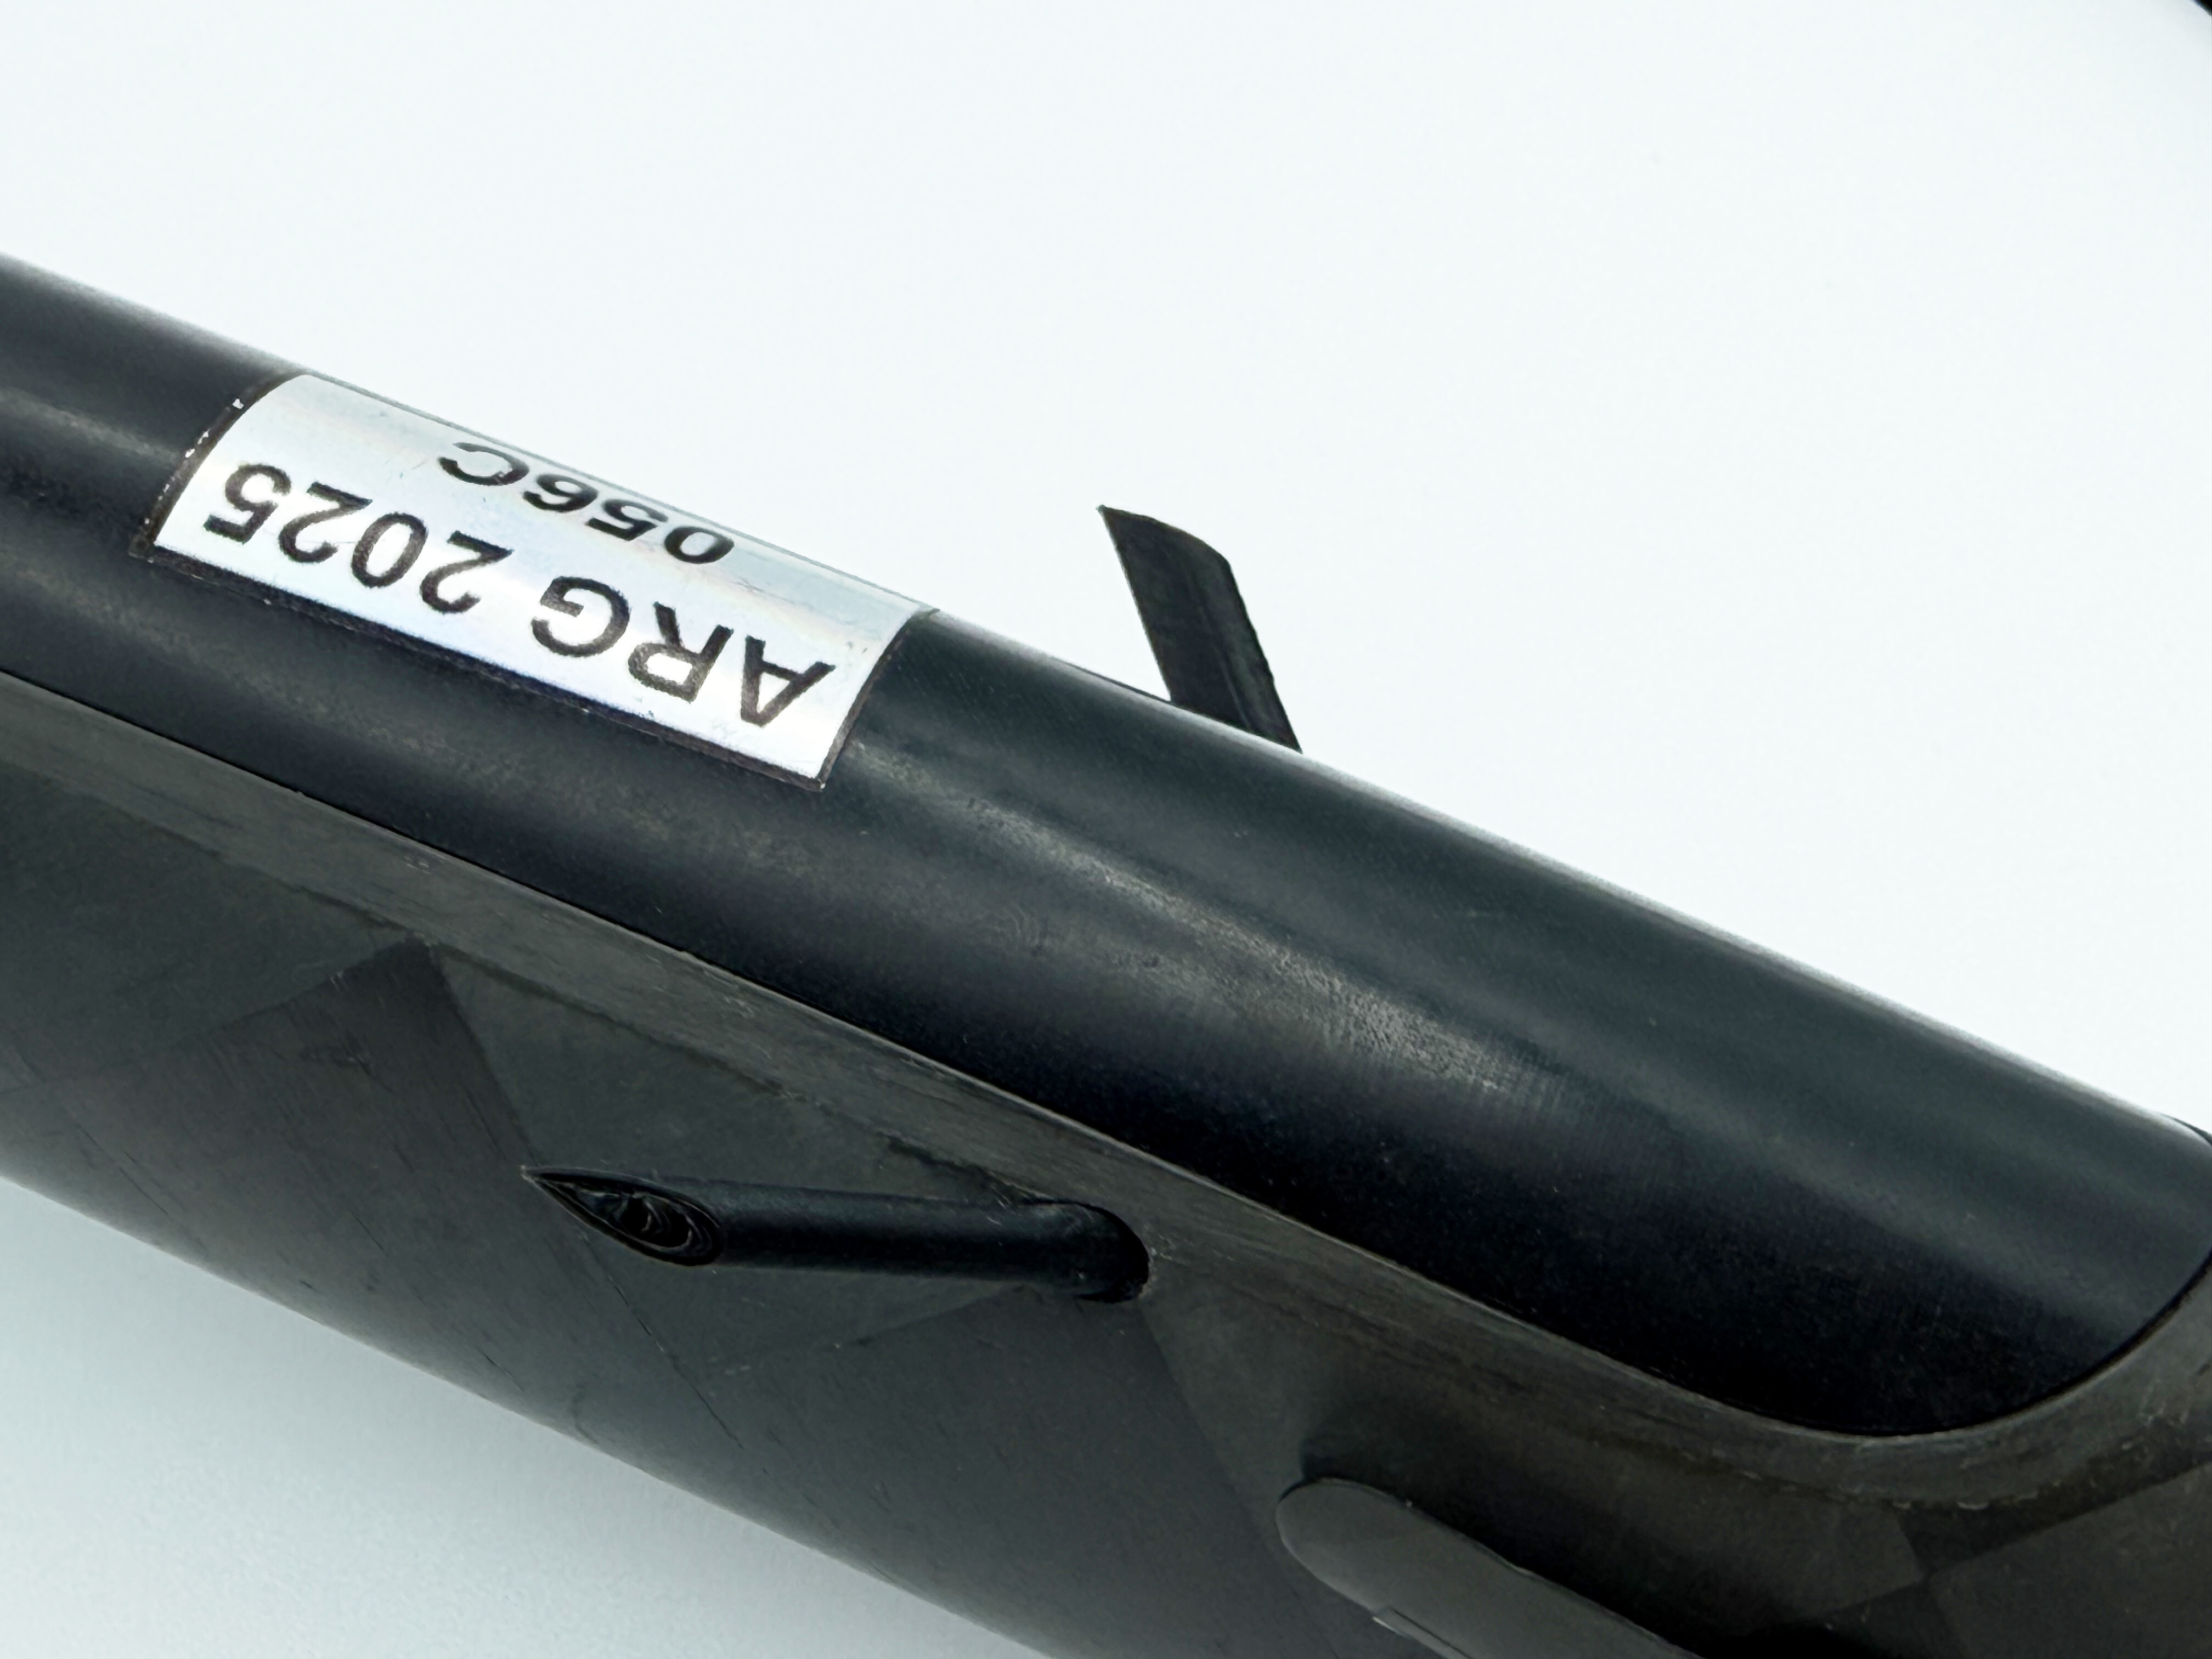
| Whisker Fairings | 1 pair (2) | 3 pairs (6) | The fairing itself. Encloses and protects the exposed antenna, holds it straight and aimed in flight, and captures the antenna’s cylindrical base inside the fuselage. Flexible, so it gives during handling and landing, then returns to shape. The external portion that covers the antenna is 23mm long. |
| Drilling stickers | enough for 1 pair | enough for 3 pairs | Stick one over each mark. It guides the cut so the hole comes out the exact size and shape to seat the fairing, and shields the fuselage finish while you work. |
| Diamond burr | 1 | 1 | A rounded-cylinder bit for a rotary tool (e.g. Dremel). Opens each hole cleanly, at the right angle, through composite or other fuselage skins. |
| Adhesive | 1 tube | 1 tube | Cyanoacrylate (CA) gel — a thick “super glue” gel that sets in under a minute. Bonds the fairing’s mounting tab to the inner fuselage wall and locks the antenna into the fairing. Used inside the plane only — nothing on the outside. |
| Heat shrink (multiple diameters) | enough for 1 pair | enough for 3 pairs | Shims the antenna for a snug fit inside the fairing — including cylindrical bases up to 3mm — and covers any length of antenna that extends beyond the 23mm fairing. |
| Placement ruler | on the card | on the card | Printed on the back of this product card. Cut it off along the dashed line and use it to mark matching antenna positions on each side of the fuselage (see How to use the placement ruler, below). |
Packaging: ships in a 3×5 resealable bag. The QR code on the card links back to this page and the install video.
Compatibility
- Radio systems: JR DMSS, Jeti, Futaba, FrSky, Spektrum and more (2.4GHz).
- External fairing length: 23mm. If an antenna’s active element is longer than 23mm, the included heat shrink covers and protects the portion beyond the fairing.
- Cylindrical base: the fairing captures bases up to 3mm in diameter (JR DMSS size); smaller bases shim snug with the included heat shrink. Antennas with cylindrical bases larger than 3mm are not compatible.
Before you start
- Tools you’ll provide: a rotary tool (Dremel or similar) to drive the included diamond burr, marker/pencil for marking mounting location, and masking/painter’s tape (optional).
- Take your time on placement. Cutting the hole is the only irreversible step. The placement ruler and drilling stickers exist so you don’t have to eyeball it.
- Work fast once glue is on. The included fresh CA gel sets quickly once the fairing is mounted, so dry-fit everything first and have the fairing and antenna ready before you apply adhesive.
How to use the placement ruler
The ruler’s job is symmetry, not absolute measurement — it makes sure your two antennas exit at mirror-image positions on each side of the fuselage.
- Cut the ruler from the card along the dashed line.
- Line up the ruler’s center crosshair with your chosen reference point on the fuselage (for example, the centerline or a fixed feature you can repeat on both sides).
- Read the same number out to the left and to the right of center, and mark each side. Because the scale is identical on both sides of the crosshair, equal readings give you matched, mirrored antenna locations.


Install steps
- Choose the receiver’s final location. Decide where the receiver will sit so you know how far each antenna reaches and where it should exit the fuselage.
- Mark the two exit points with the placement ruler, so the antennas mirror each other on each side and sit roughly 90° apart for good diversity reception.
- Apply a drilling sticker over each mark to guide the cut and protect the surrounding finish. For extra protection to your plane while drilling, you may consider adding a protective layer of tape around the sticker.

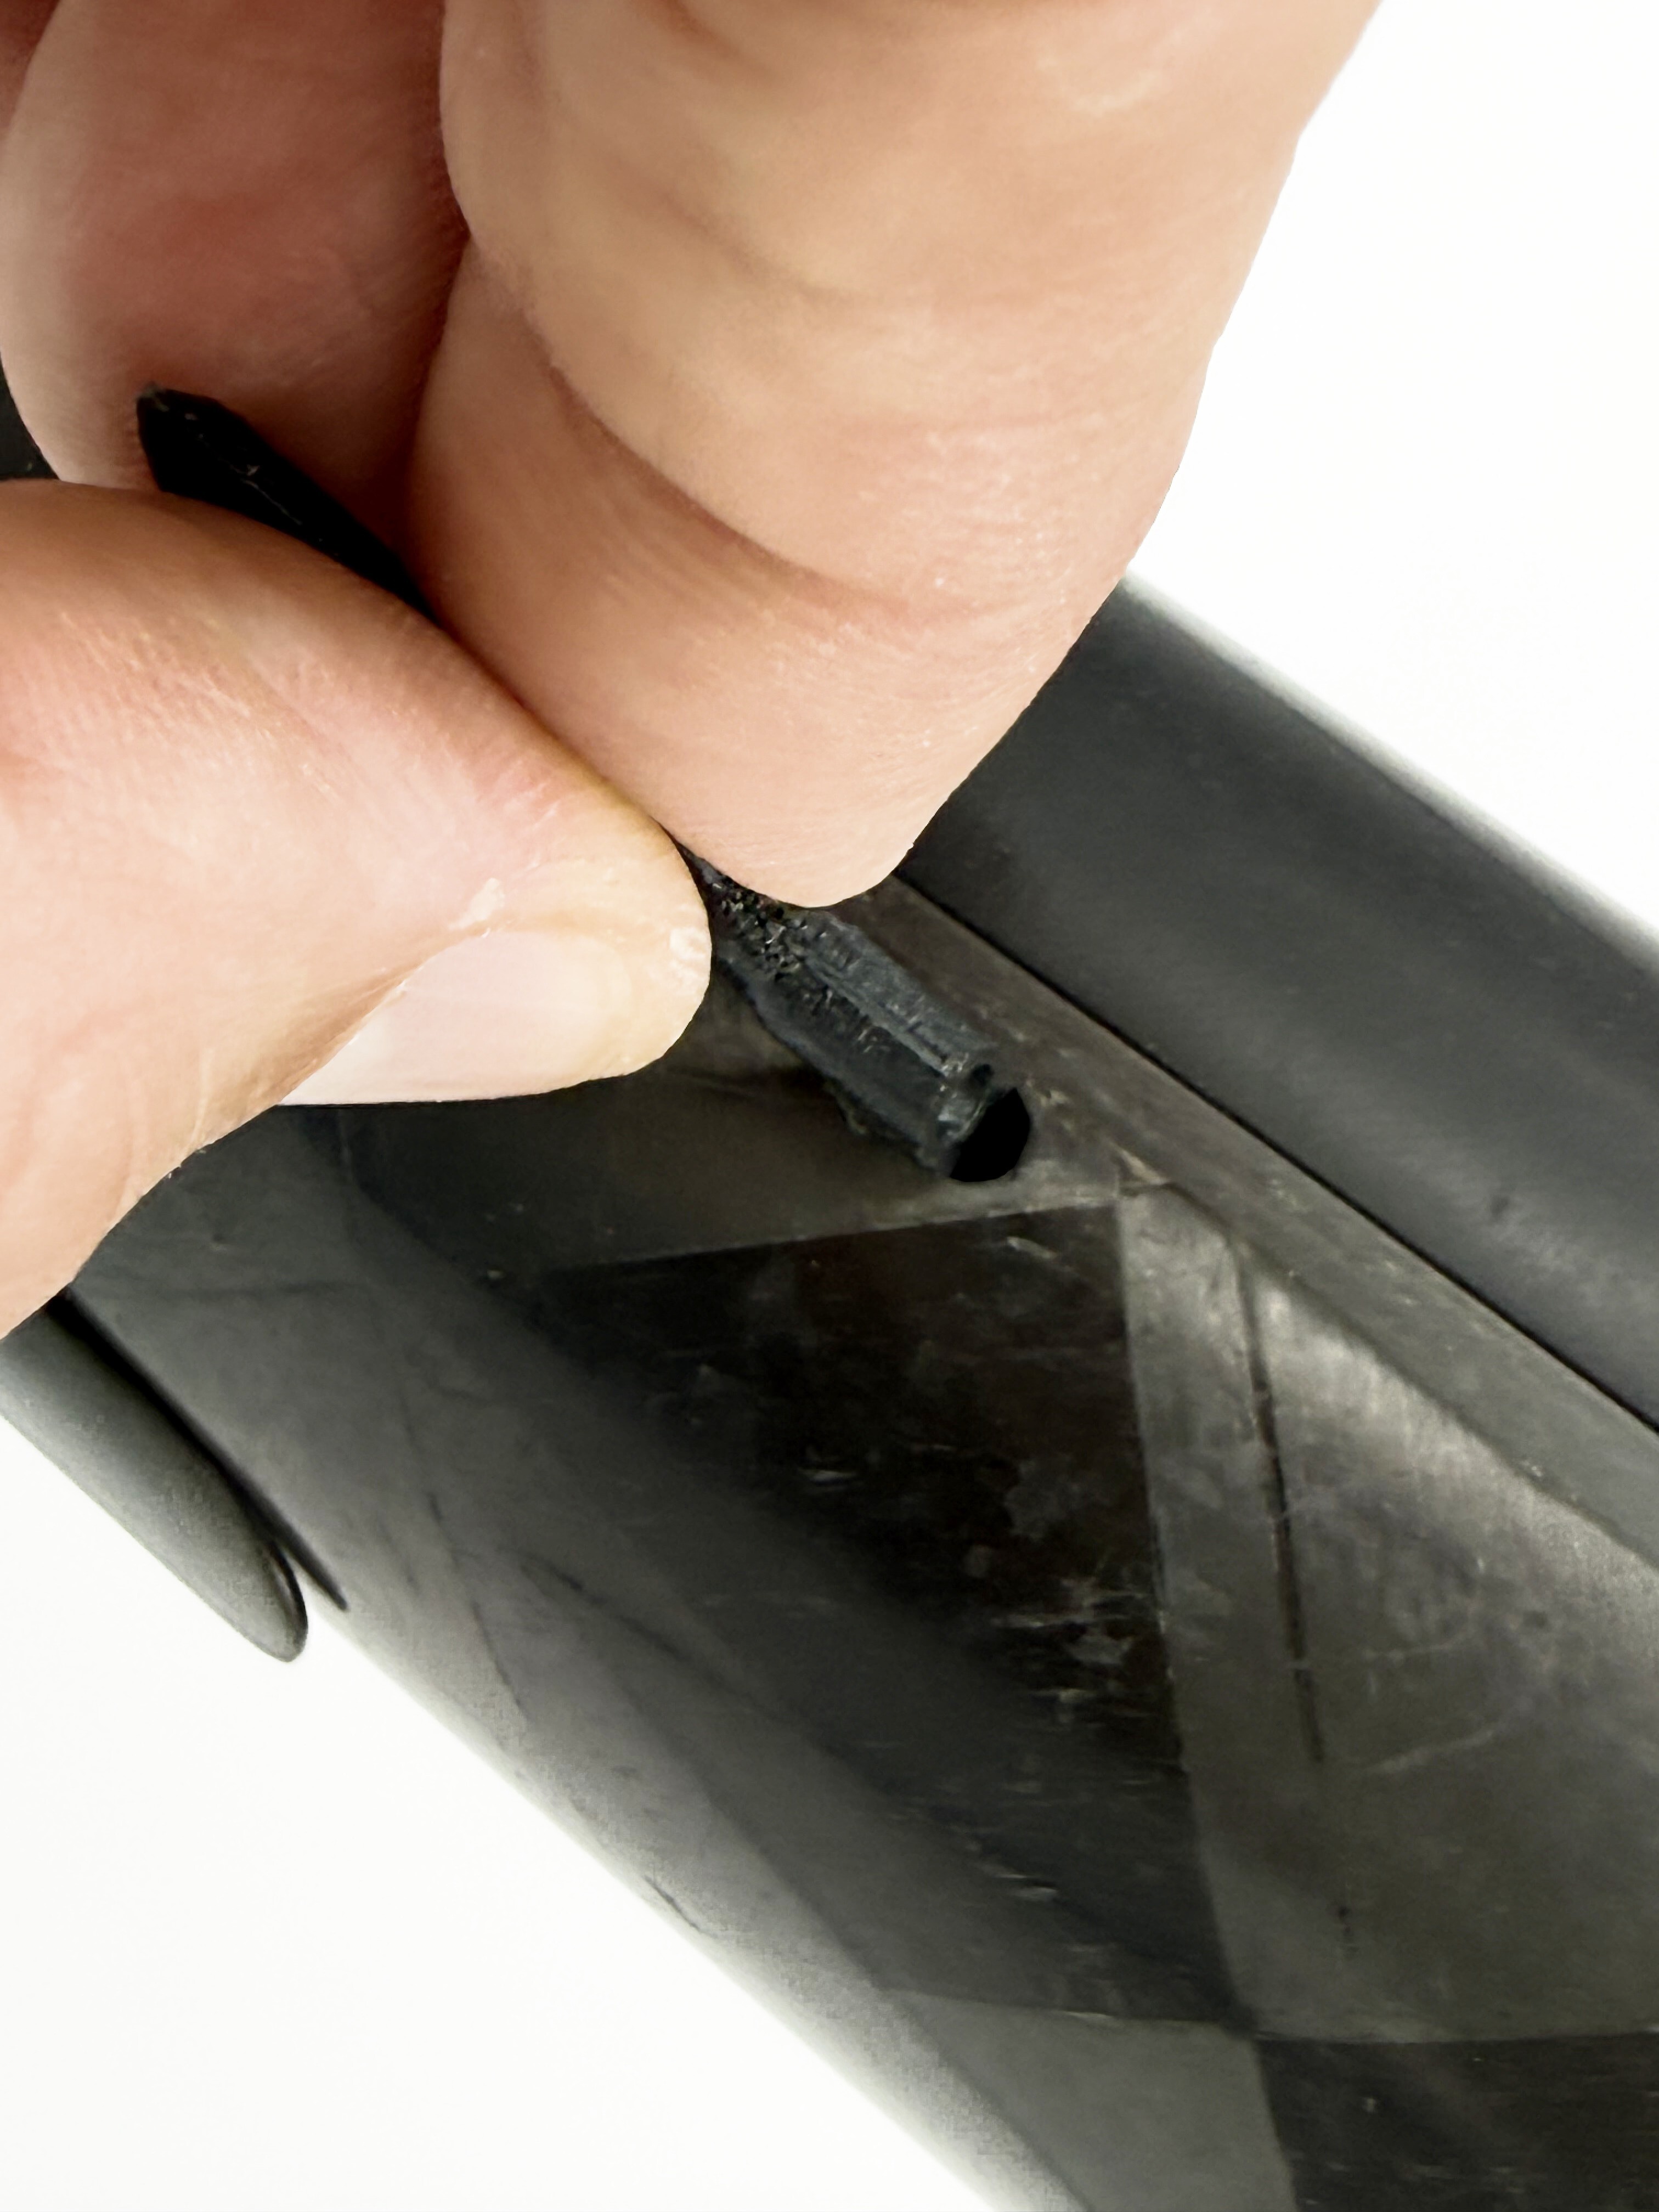
- Drill an initial round hole with the diamond burr in your rotary tool, starting at the center mark of the sticker. Drill the hole perpendicular to the surface as shown in the photo below. Use high speed on your rotary tool and light pressure to get through the sticker. Once you reach the carbon fiber of your plane, the burr tool will penetrate quickly.
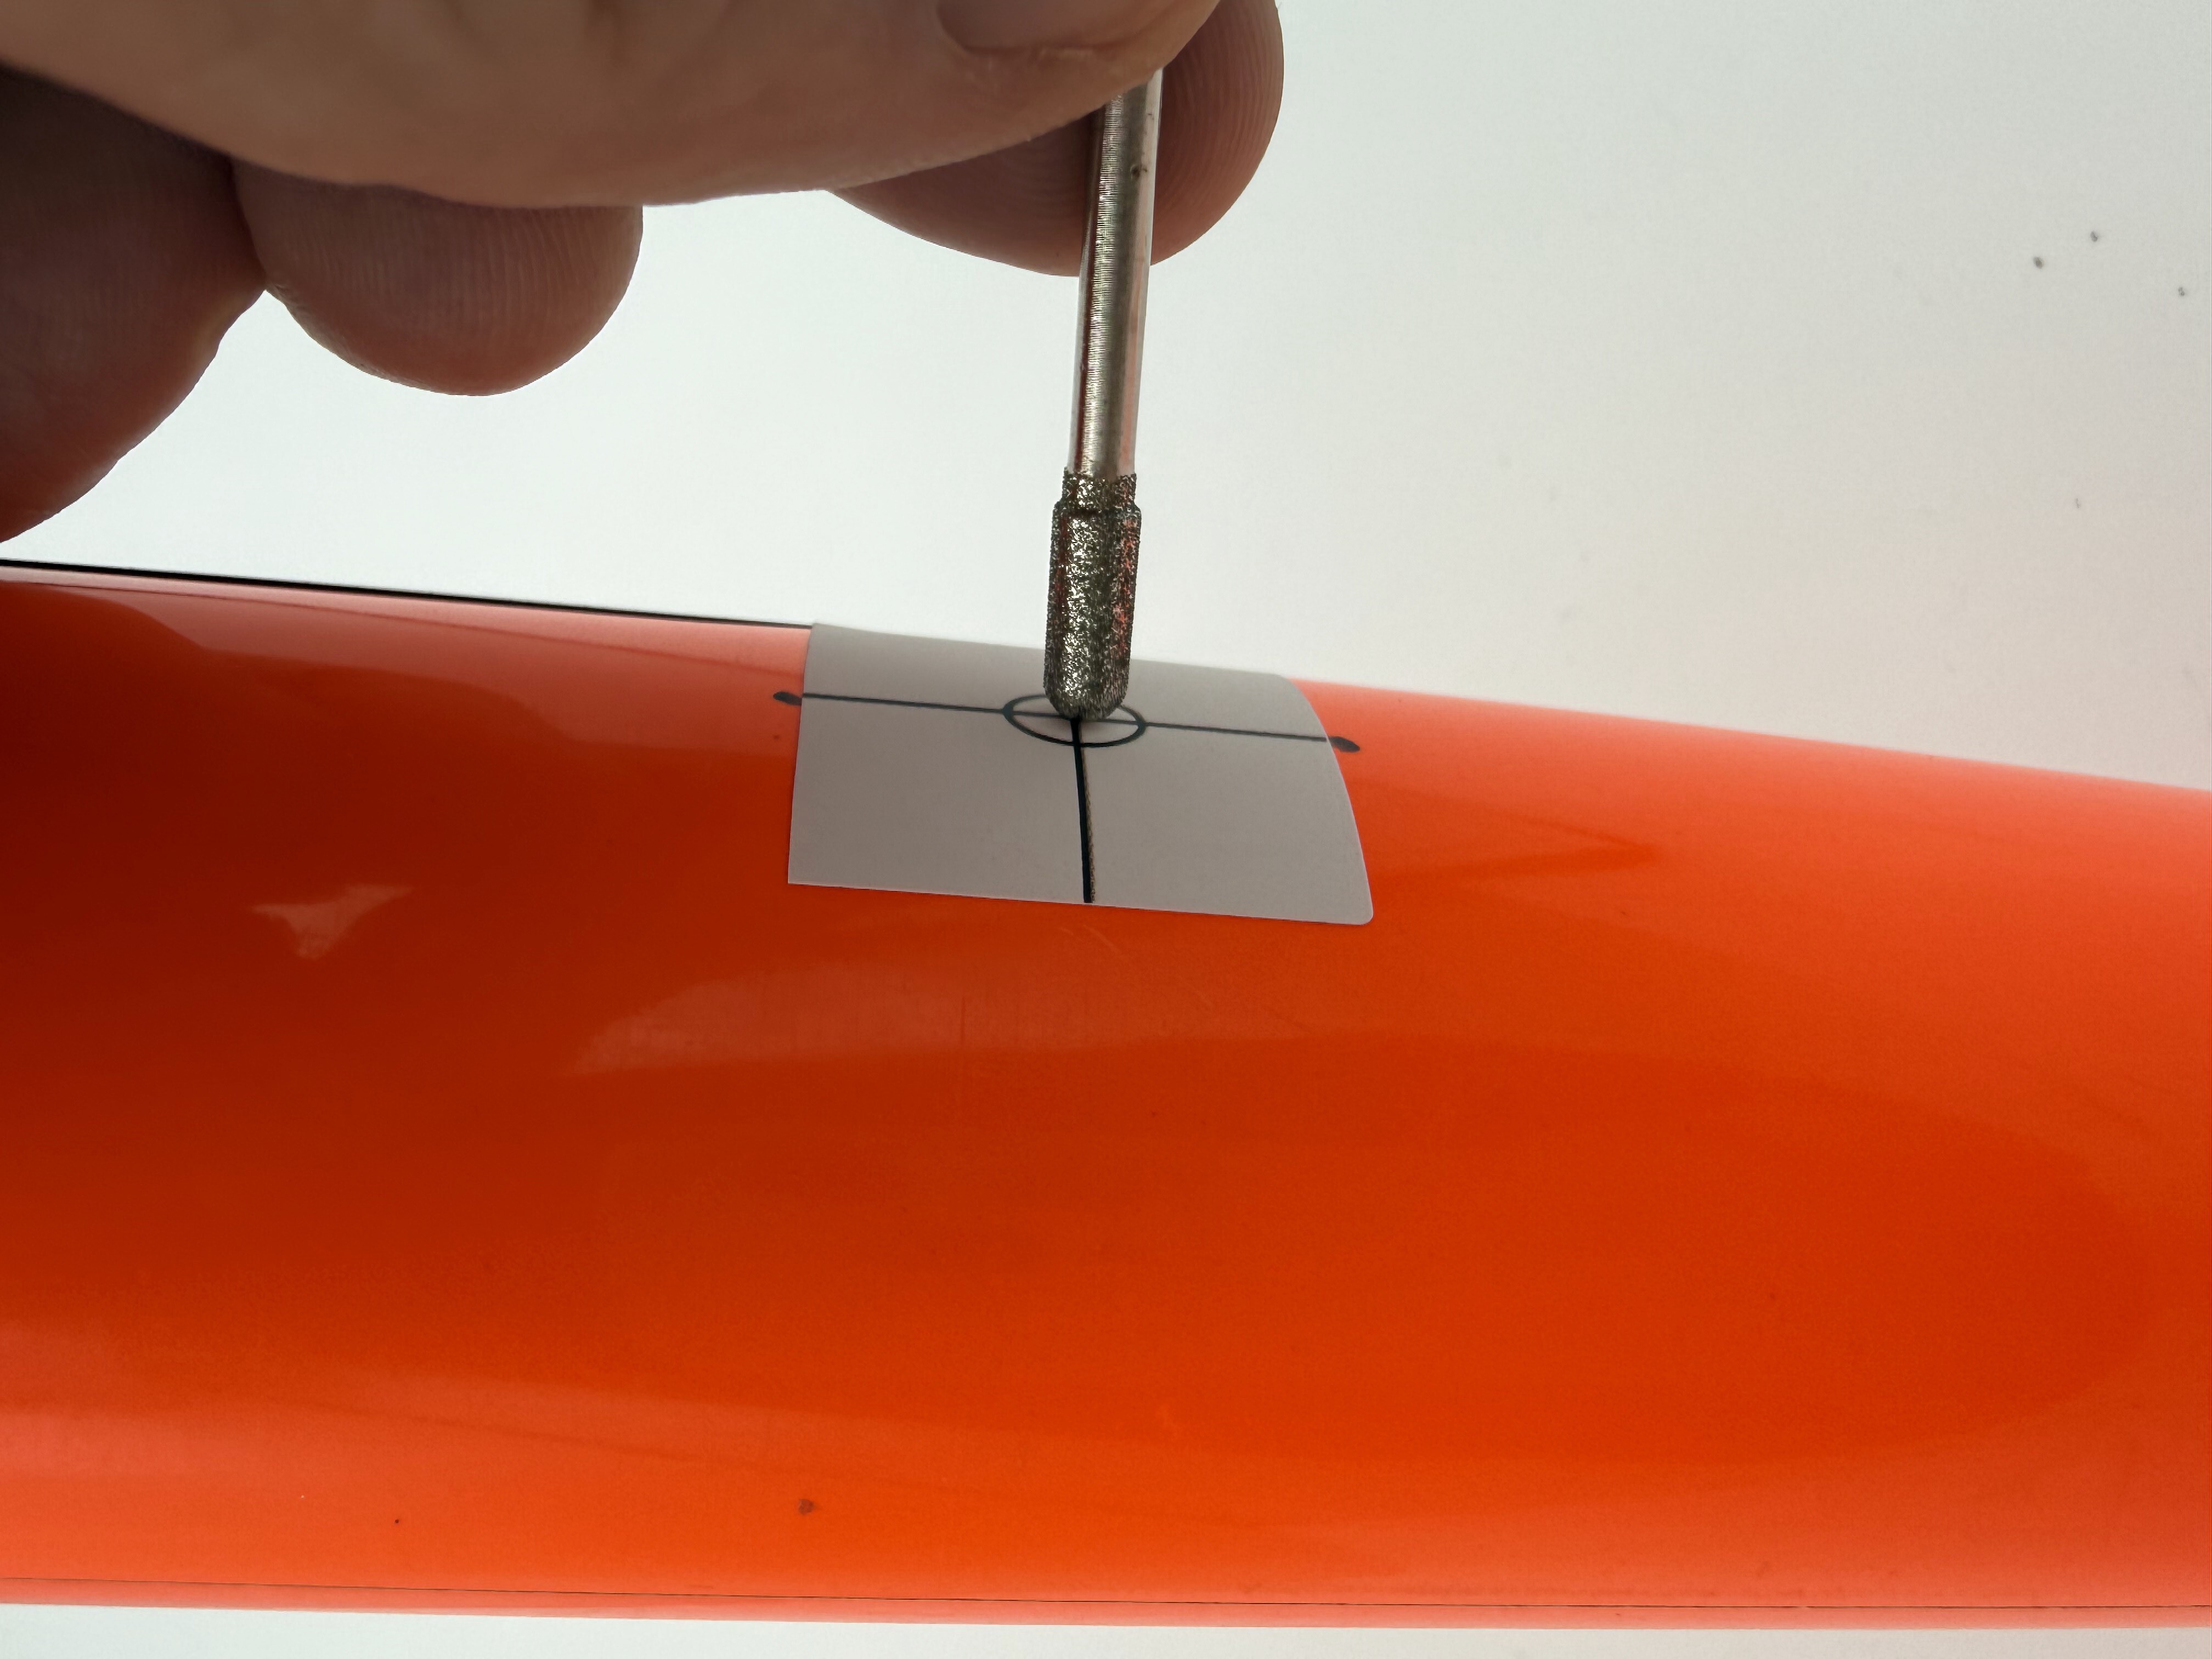
Note: The burr tool is most effective and necessary for a clean hole in carbon fiber composite and may be less effective on other materials. This will generate fine carbon dust, so take standard precautions to ensure you do not inhale the dust. The sticker is waterproof in case you choose to wet the surface/tool to keep dust down.
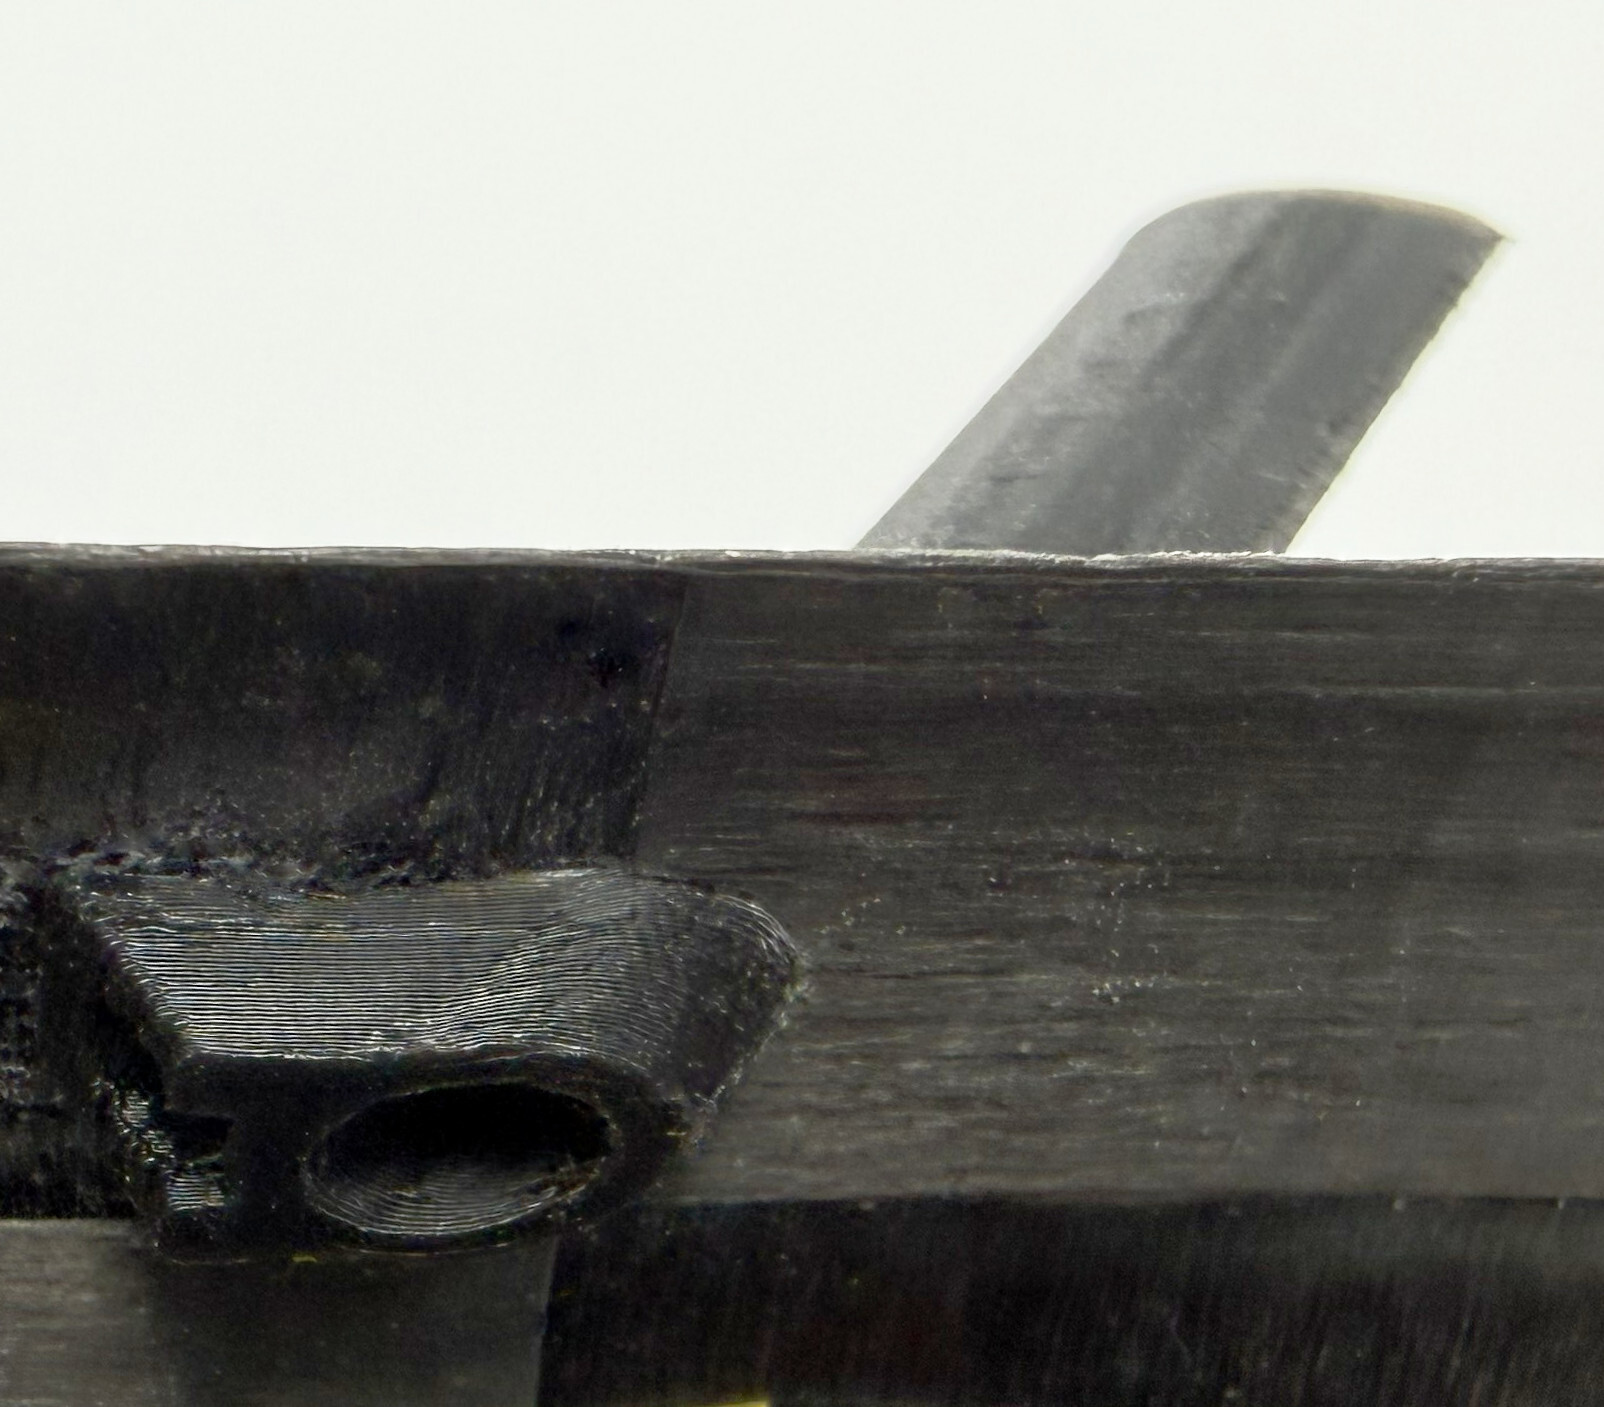
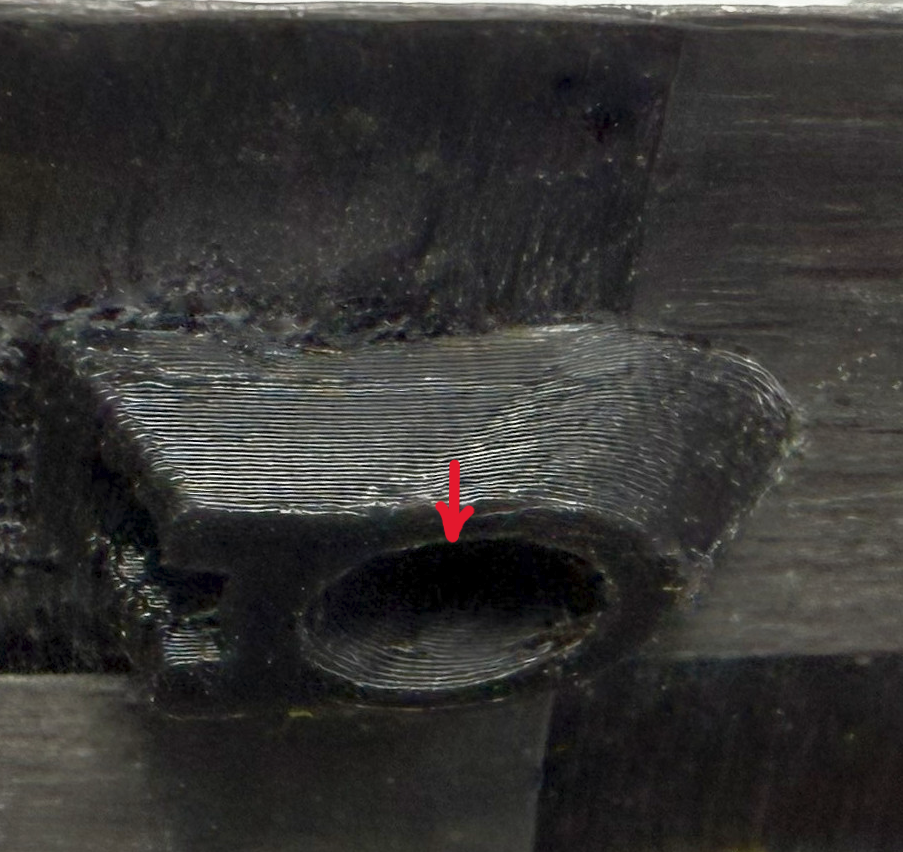
- Complete the shaping of the hole by inserting the burr tool into the hole, turning on your rotary tool at low speed, and angling your tool 45 degrees toward the rear of your plane. Keep an eye on the template to ensure you grind out only the white portion of the elliptical template. The second photo below shows a properly formed mounting hole once the template sticker is removed.


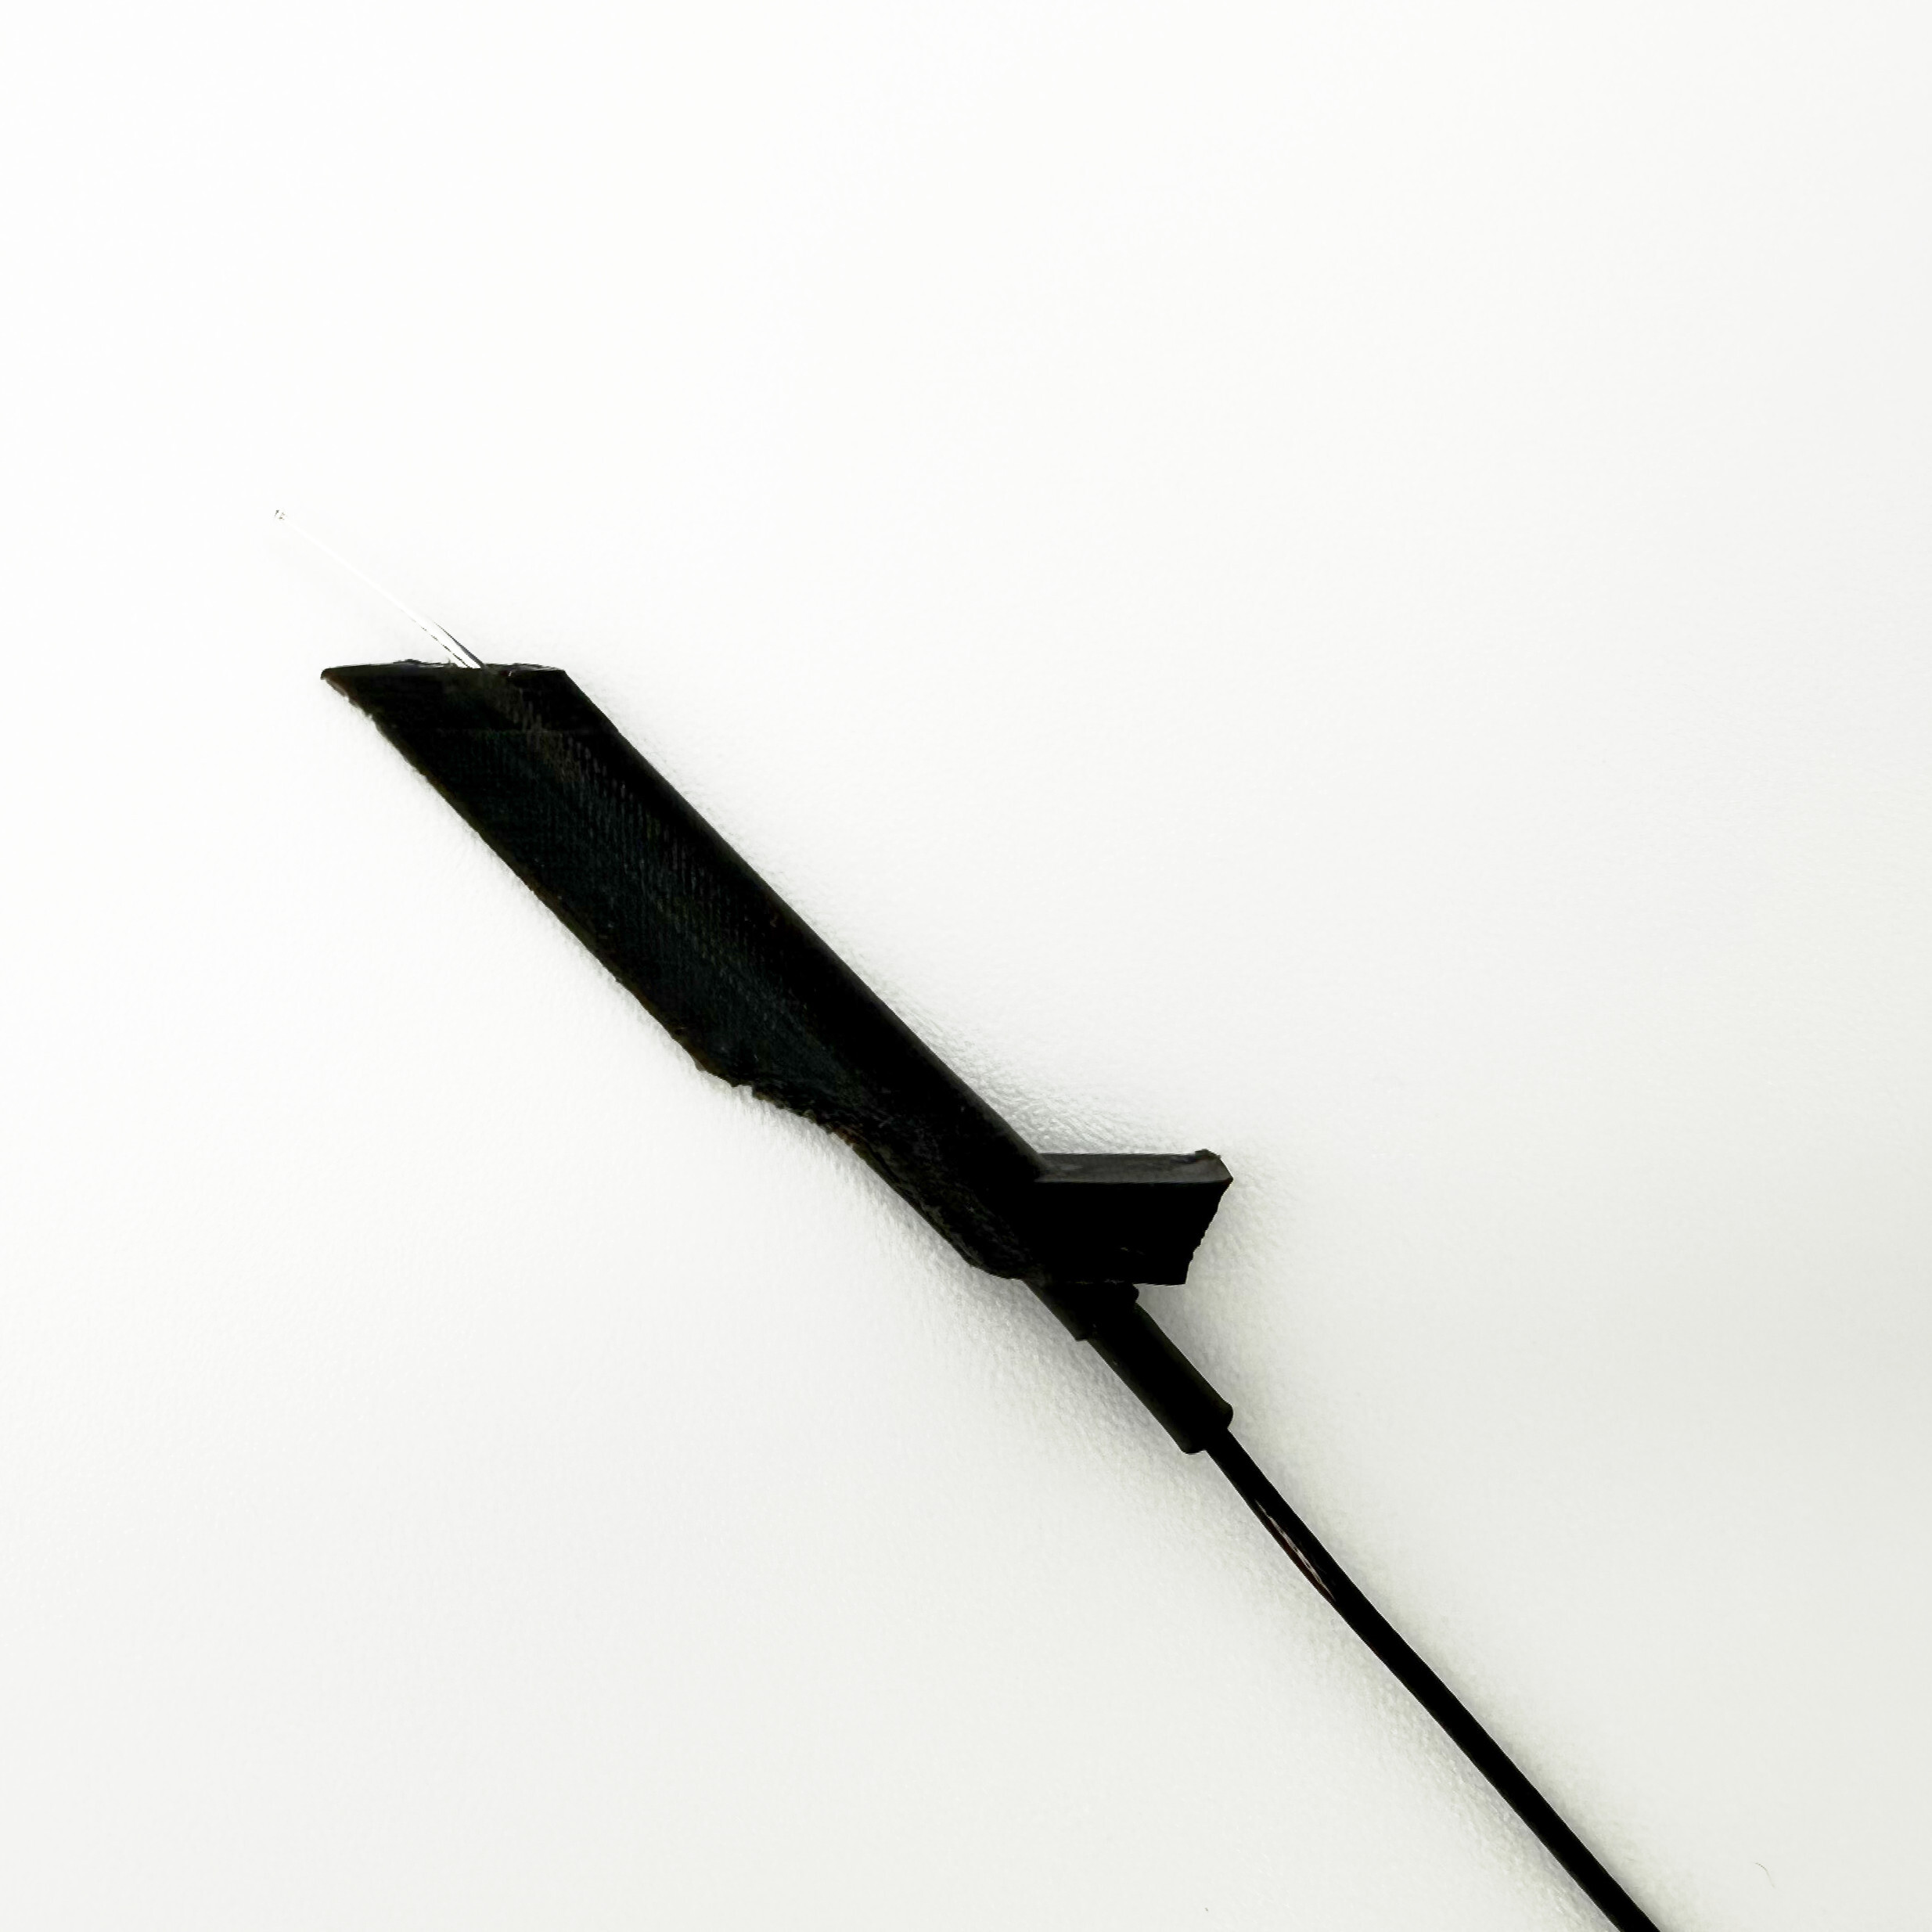
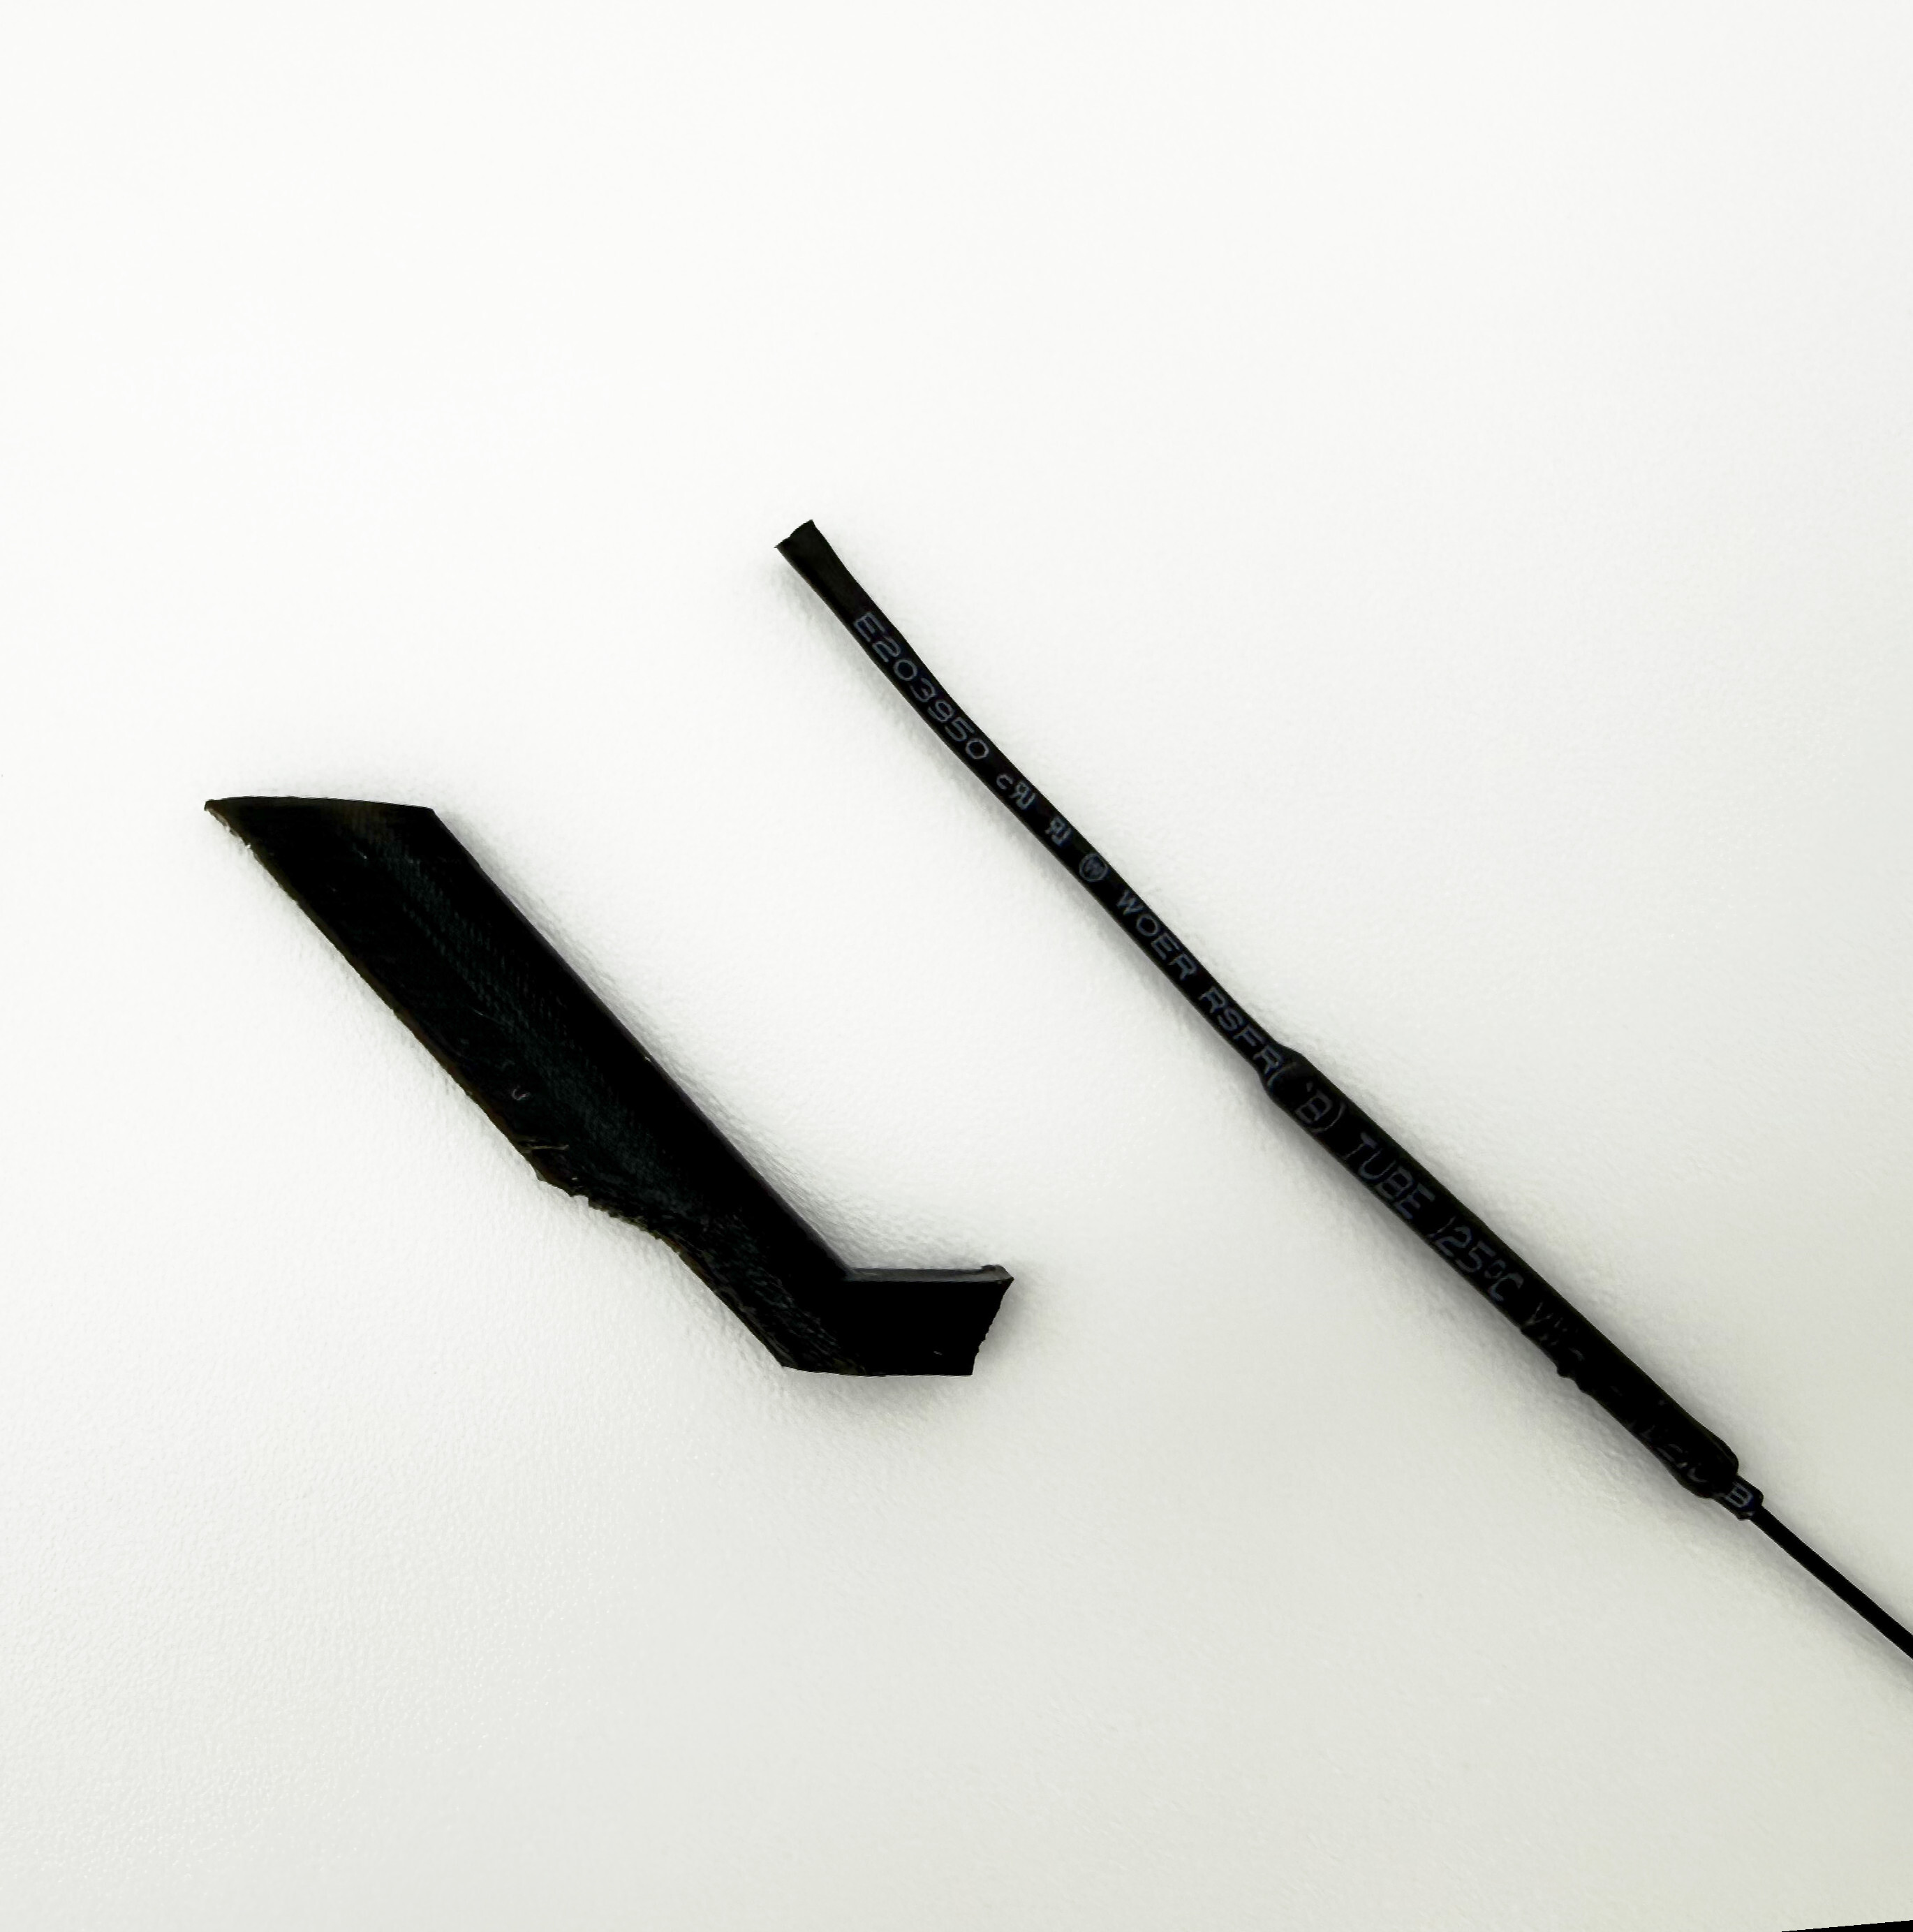
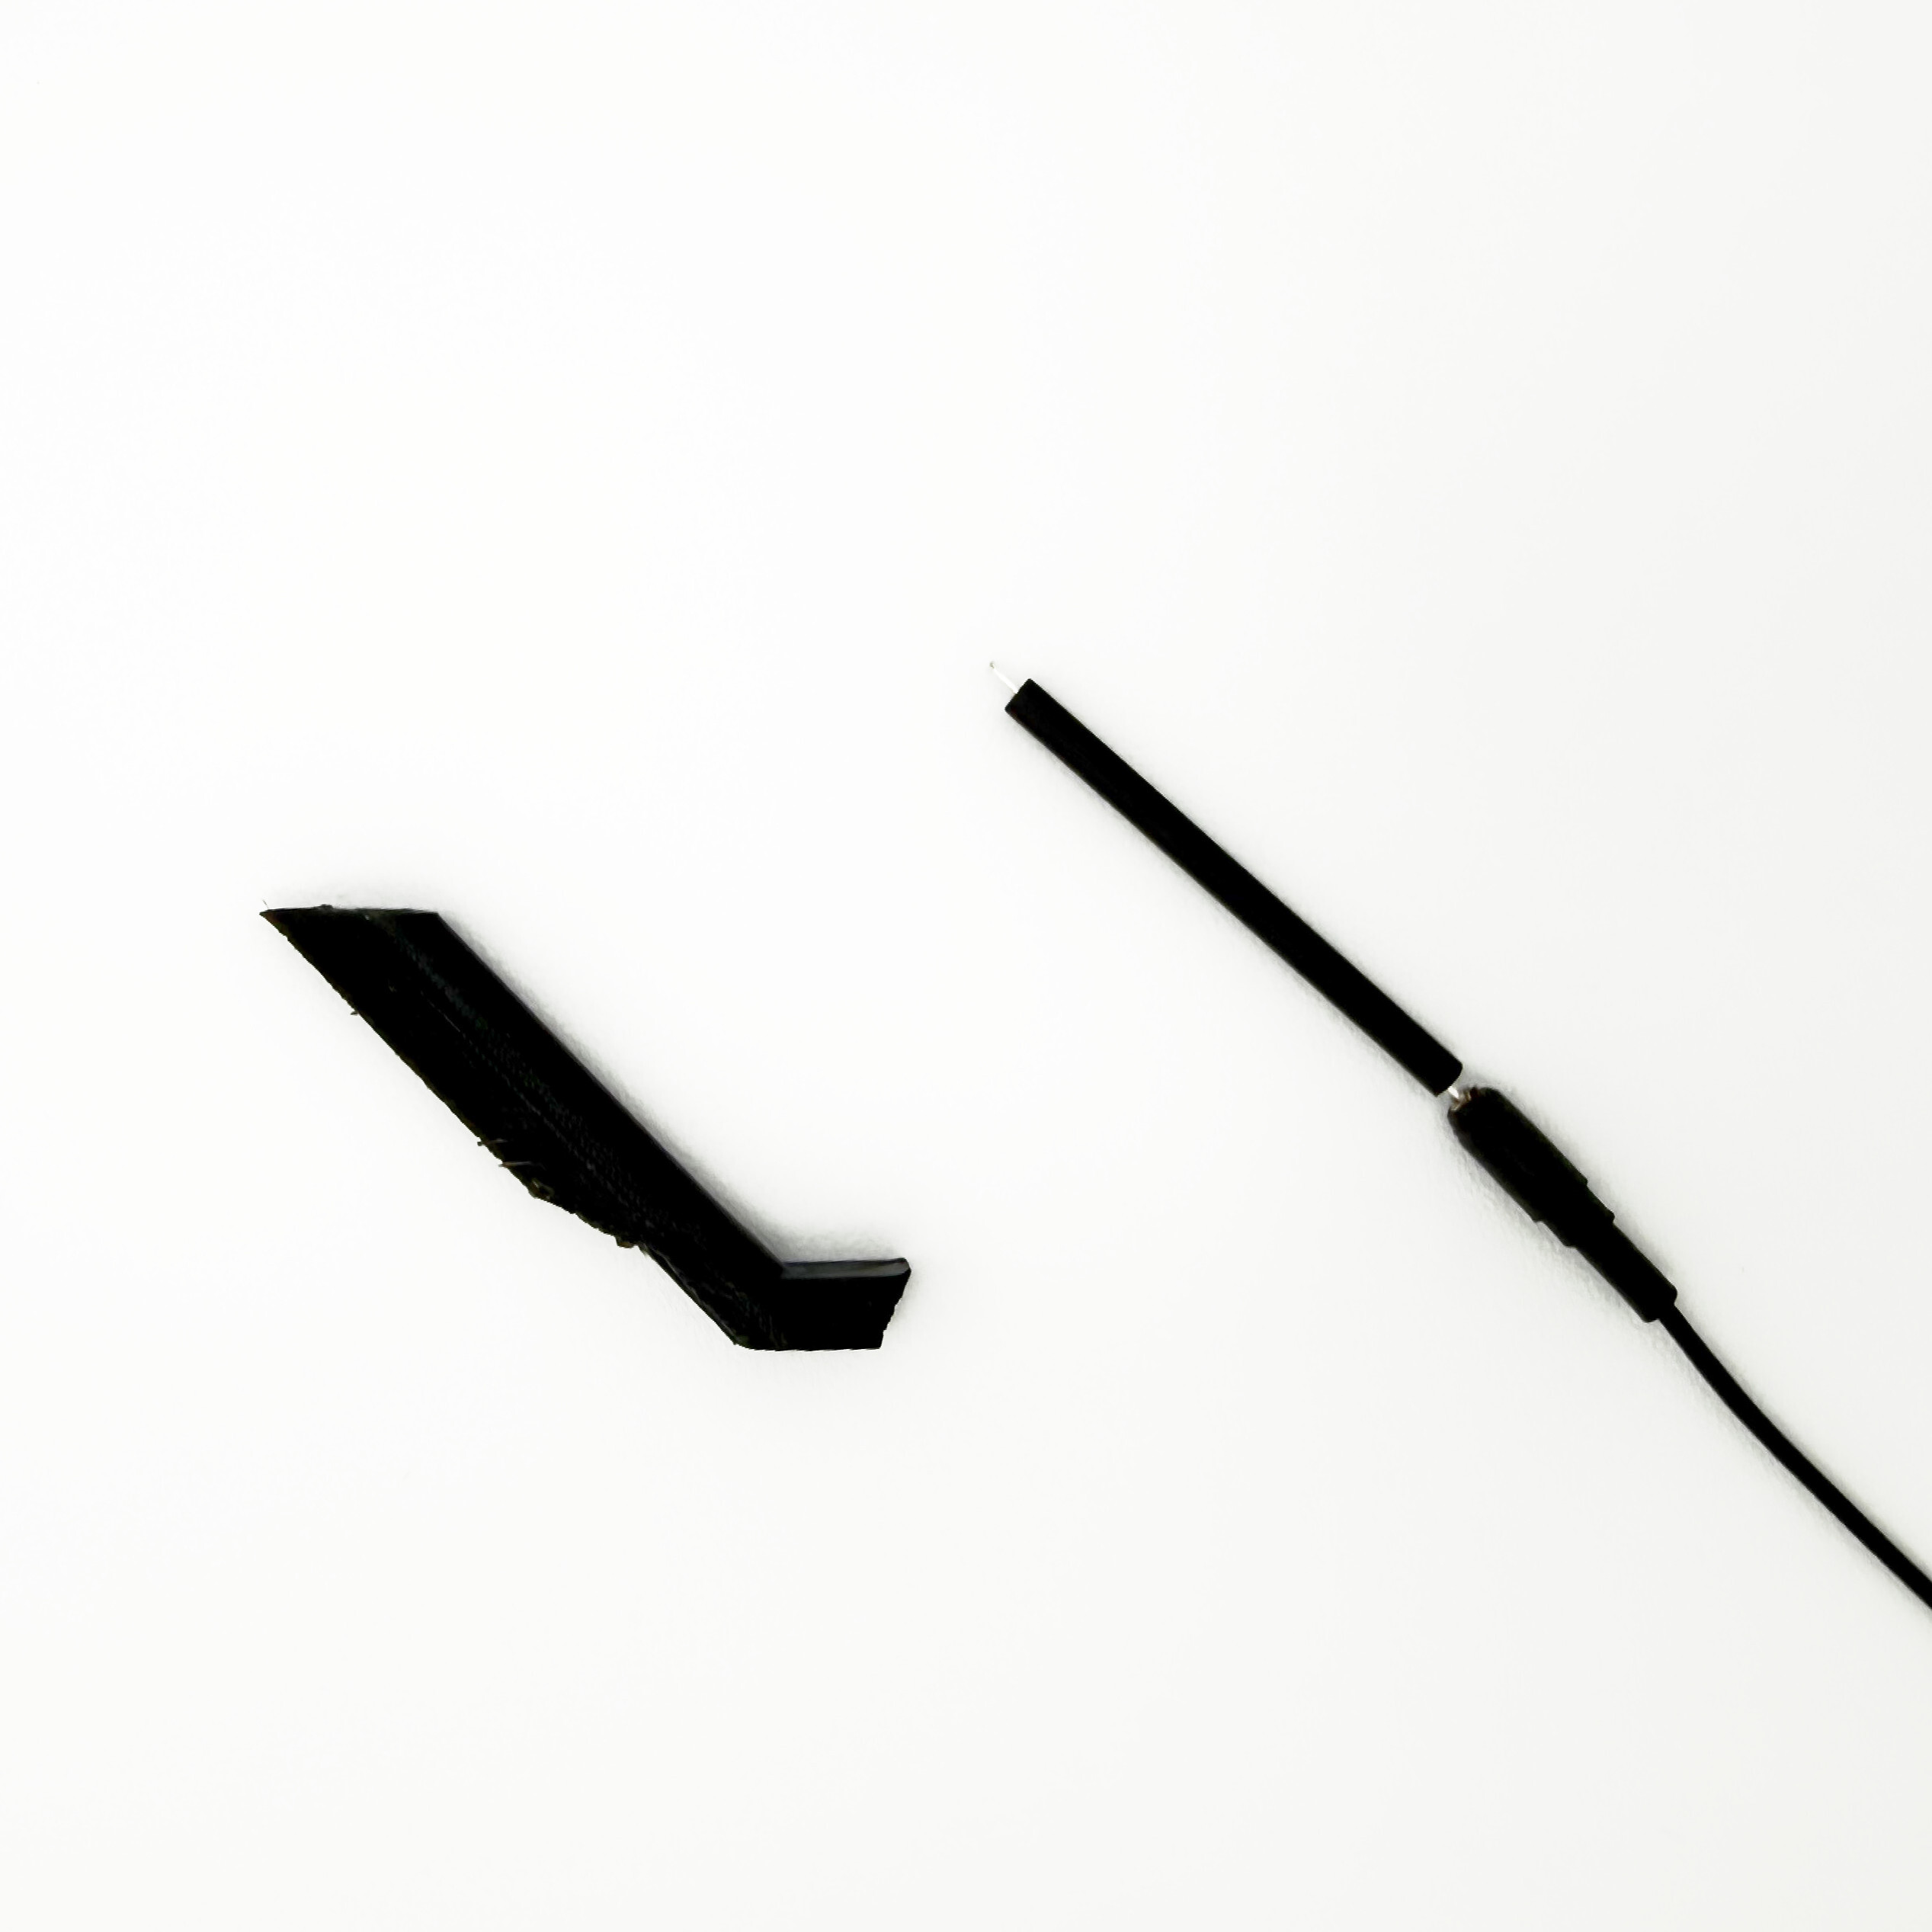
- Prep the antenna. Apply the heat shrink as needed to shim the antenna for a snug fit in the base of the fairing, starting with the smallest heat shrink that will fit. Where you apply the heat shrink will determine how far the antenna can be positioned outside of your fuselage.
Note: On most antennas with cylindrical bases, no heat shrink is required. Just push the antenna into the fairing until a stop is reached inside the fairing.
Apply heat shrink if needed


Check fit in base of fairing
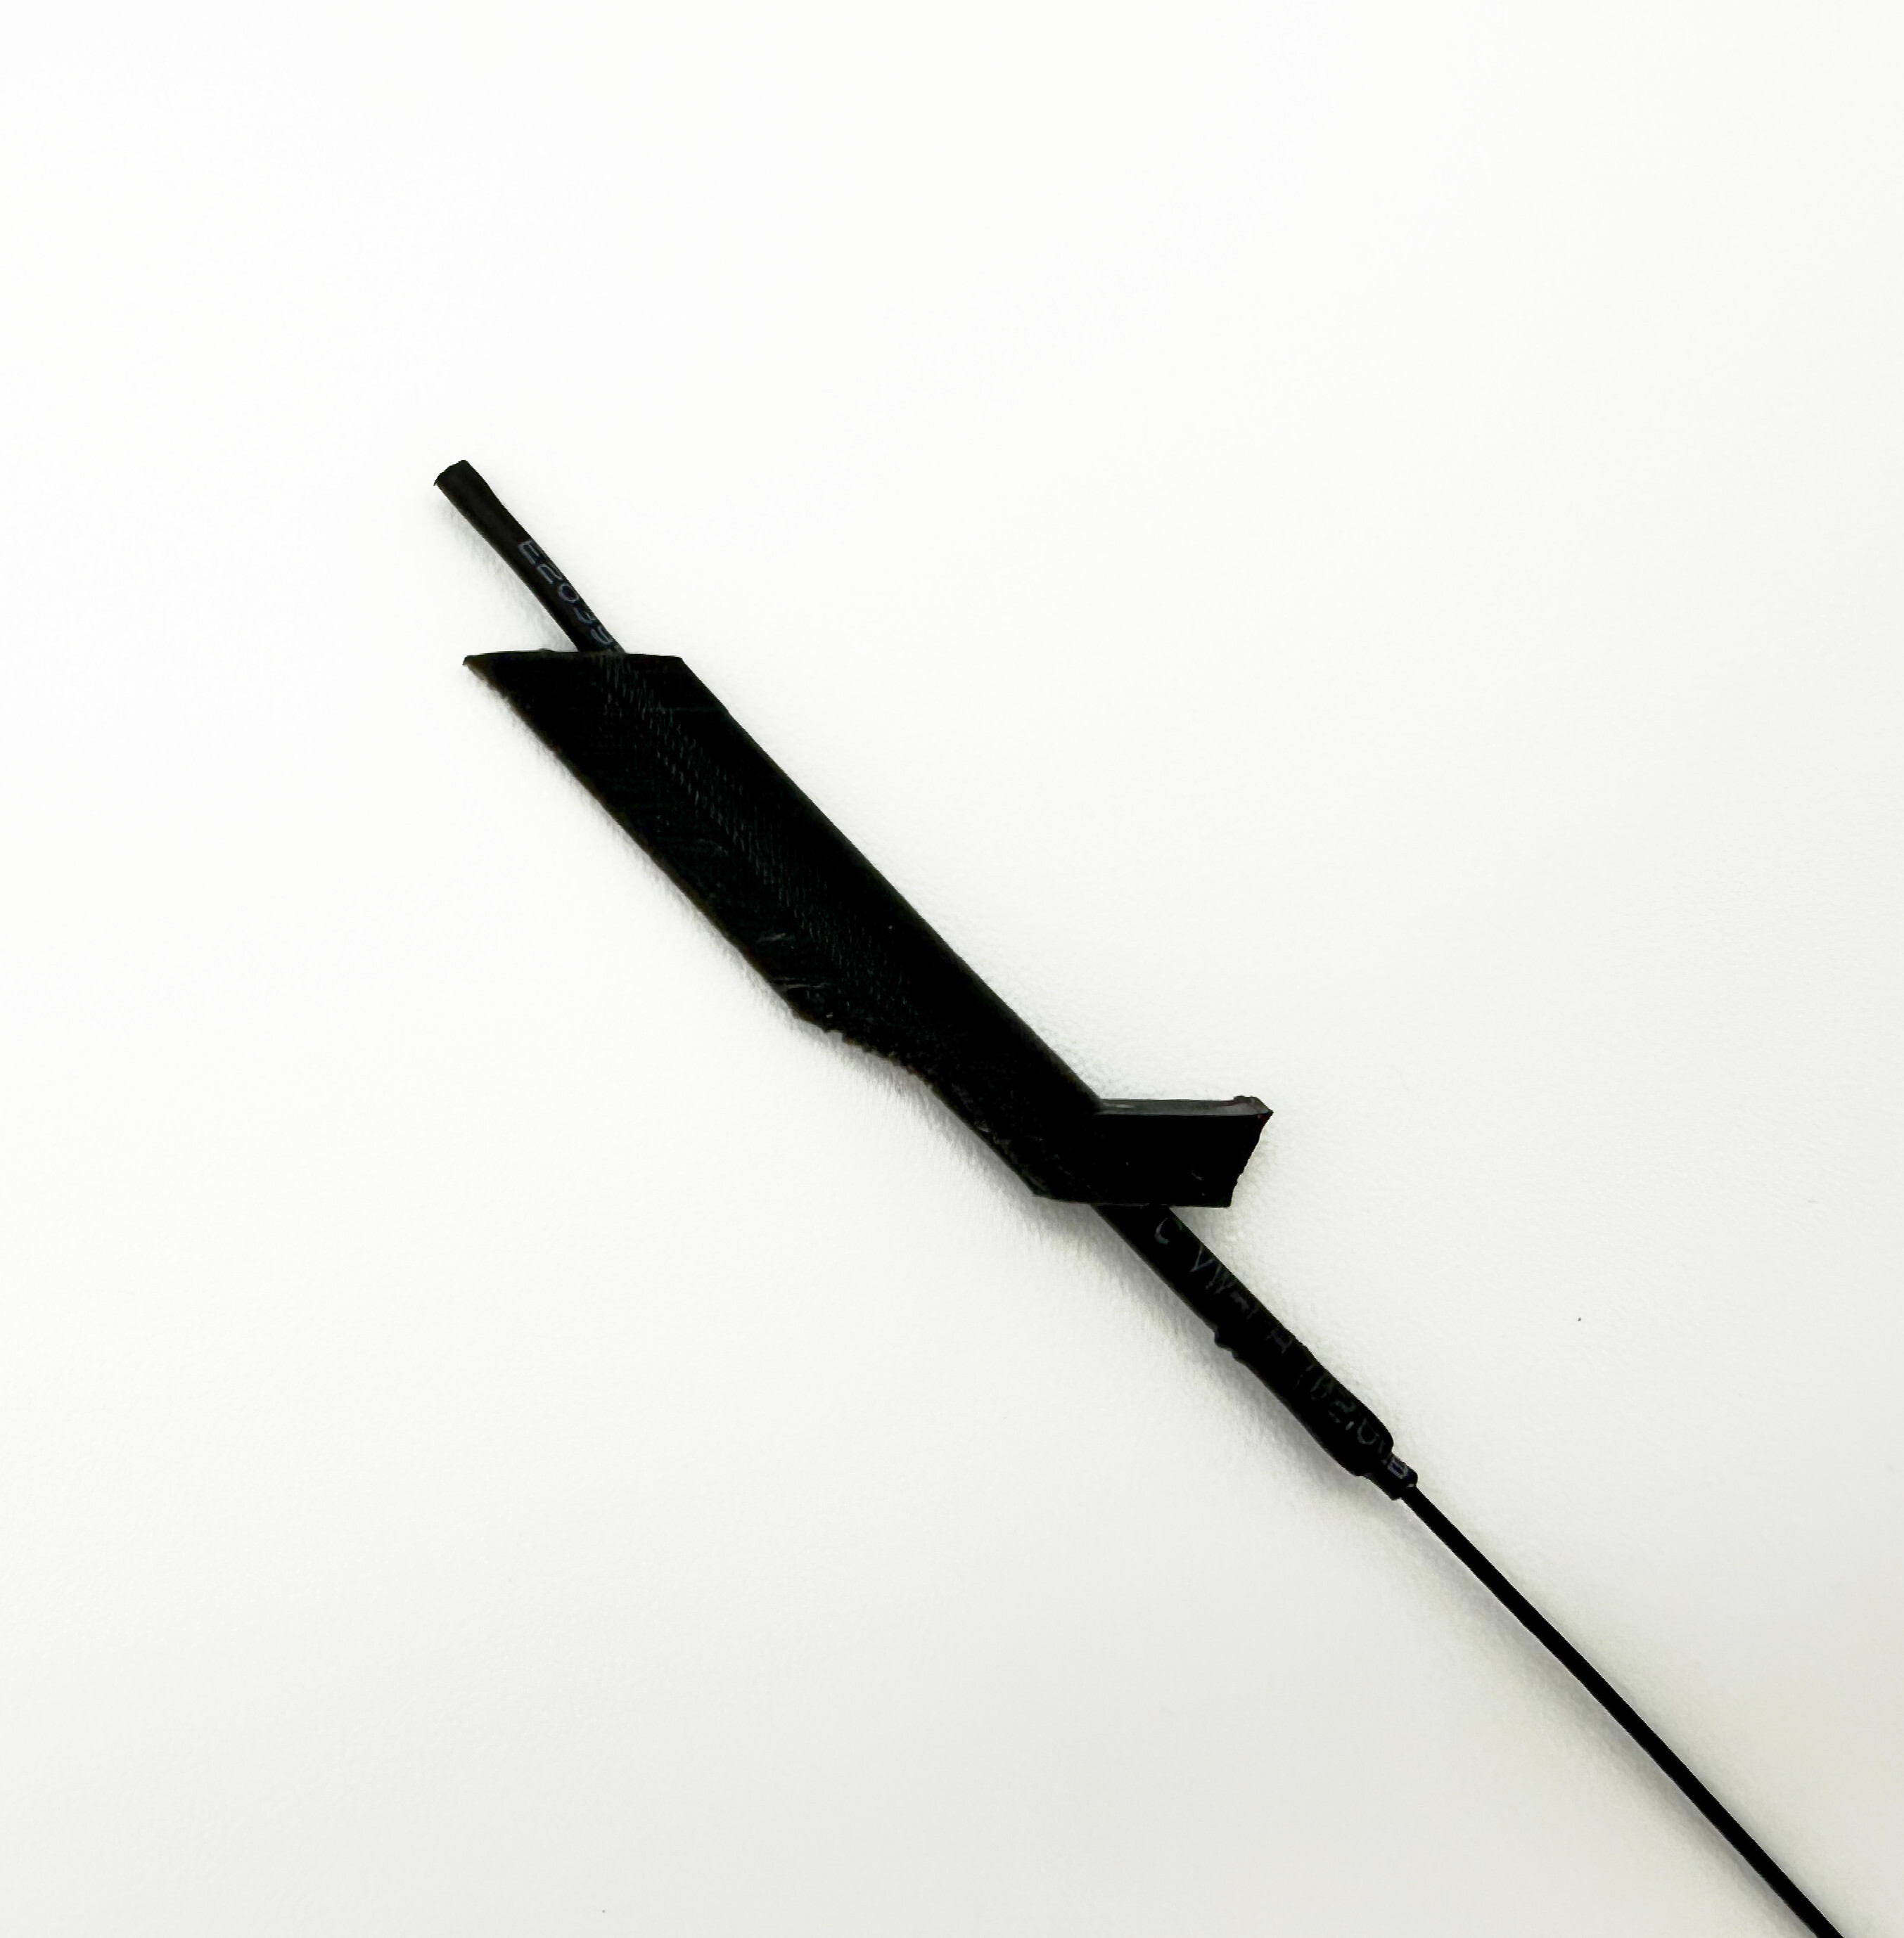
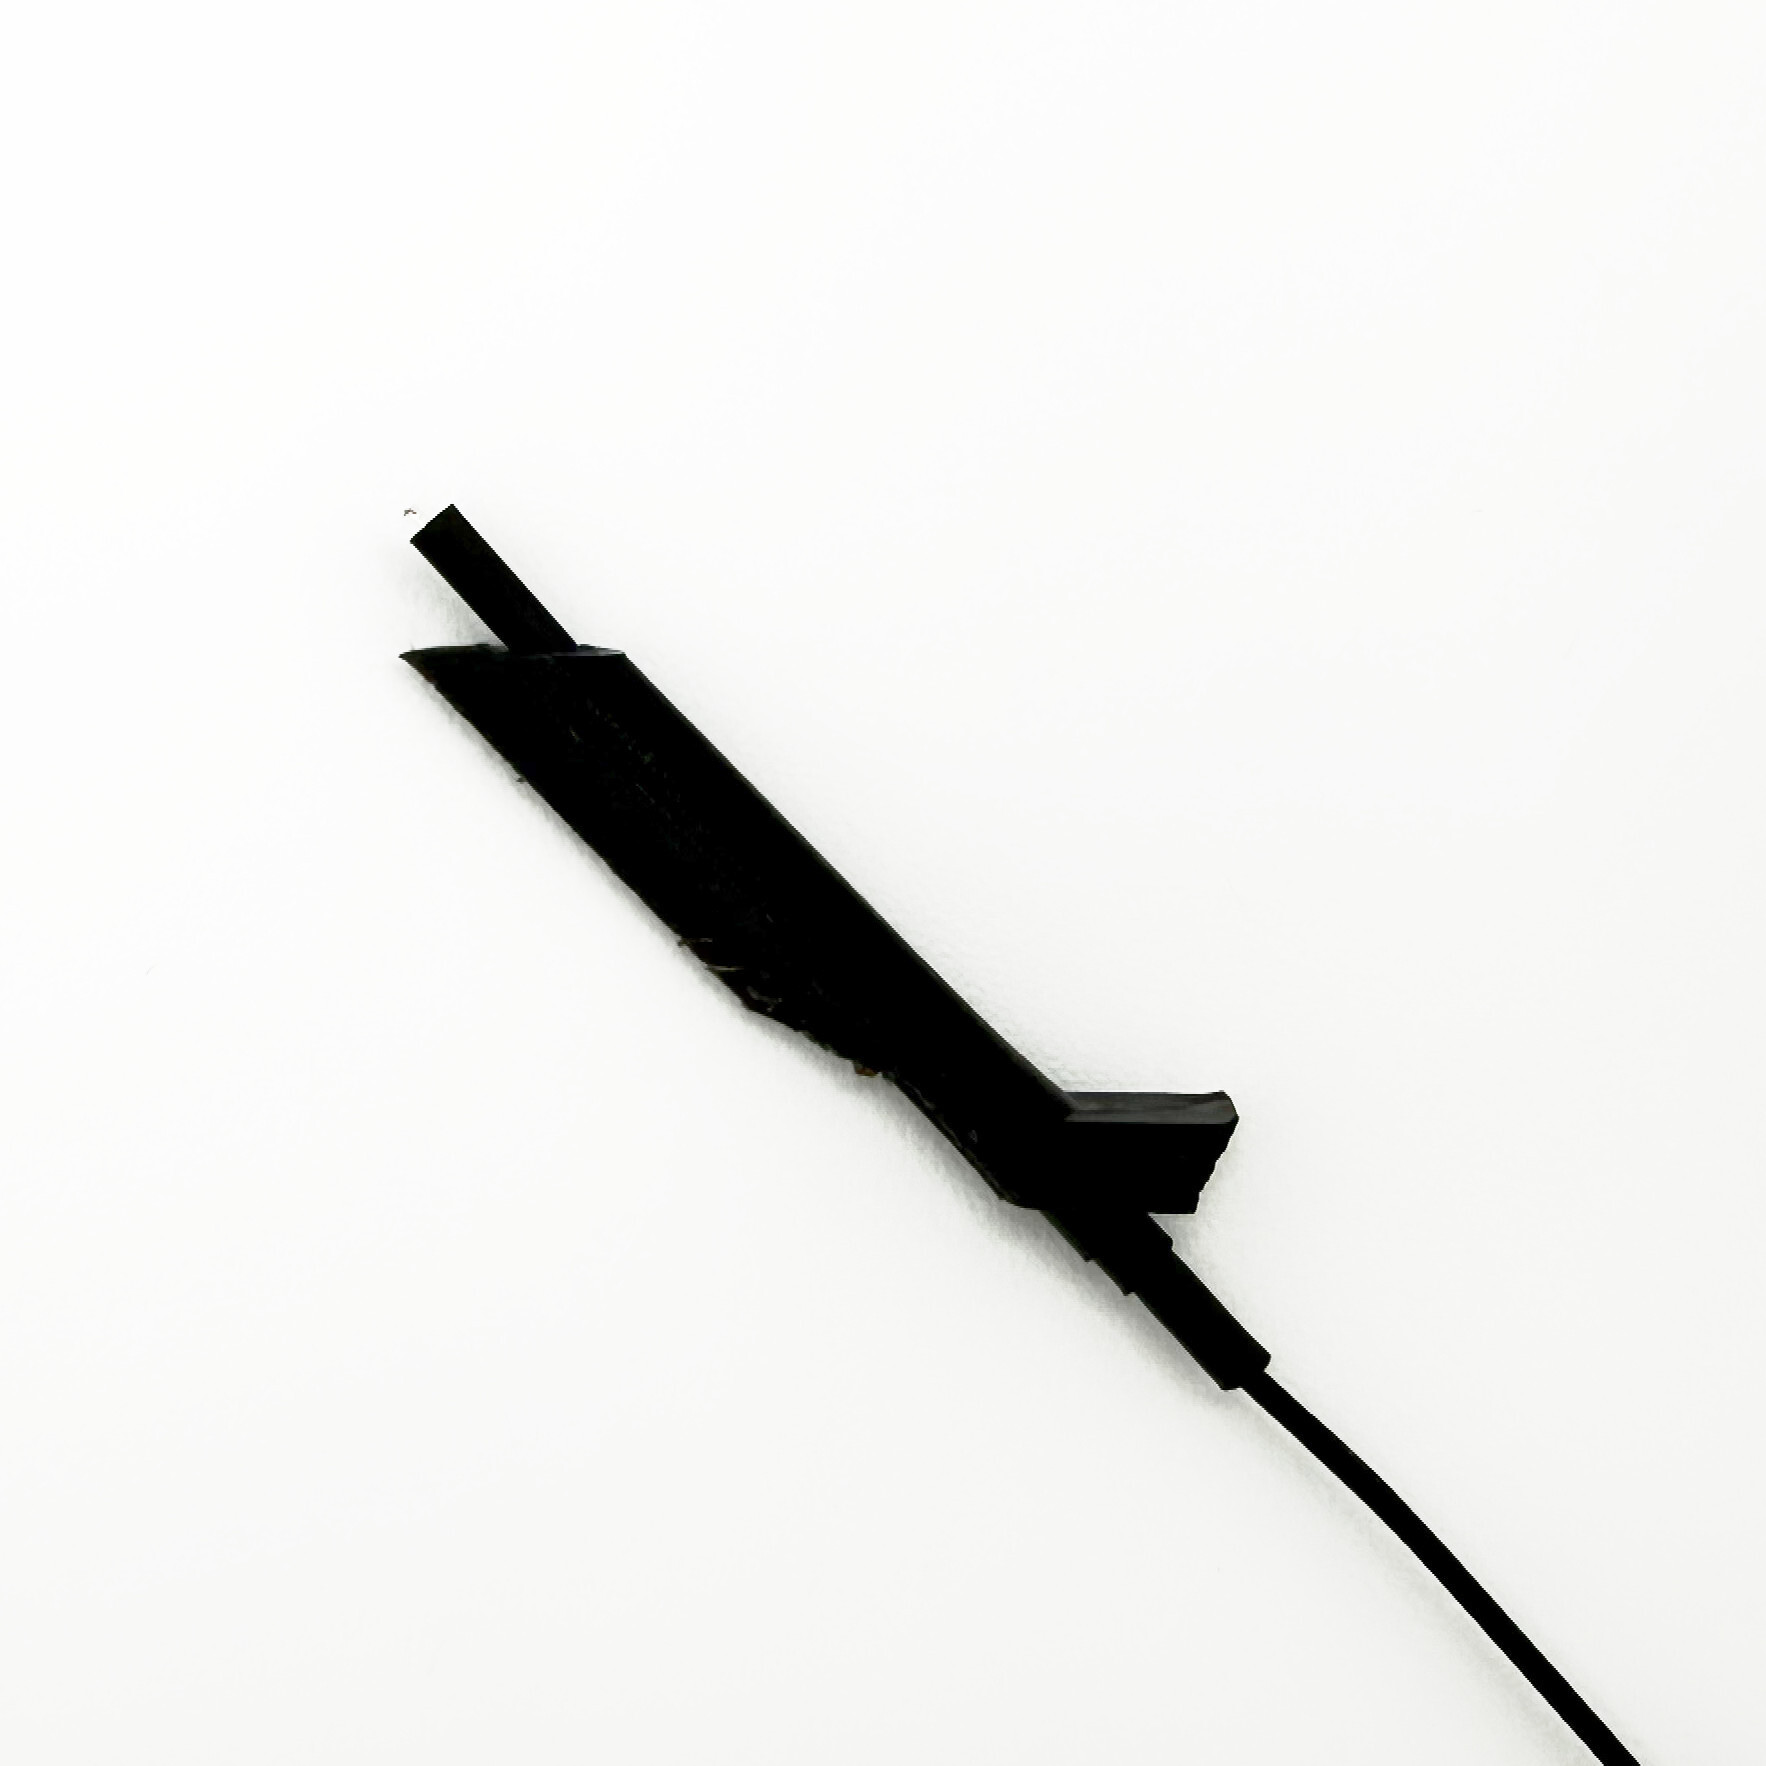
- Seat the fairing. Feed it through the hole from the outside of your fuselage and seat the fairing so the external fairing’s airfoil shape sits aligned to the fuselage and the mounting tab lands against the inner wall. If you cannot manage to get the mounting tab to lie flush without resistance from the fairing, repeat step 5 very slightly. You may want to use the burr by hand without the rotary tool… just make sure you hold the burr at a 45 degree angle.
Feed fairing through mounting hole
Verify tab lies flush against inner wall without resistance (bending of fairing)
- Bond from the inside. Apply the CA gel to the mounting tab and apply the tab to the inner wall. Be careful about the alignment as the CA gel should cure very quickly. No adhesive goes on the outside of the plane — the exterior stays clean.
- Check your work. Confirm the antenna is straight and the outside is clean. If you find it’s misaligned, remove the CA with CA remover and try again. Repeat for the second antenna.
- Ensure antennas will not back out of fairing. Insert your antennas. The friction fit of the antenna may be very good, but it is recommended that you apply a drop of the included CA — or a less aggressive adhesive of your choice (like E6000) — as shown below (while the antenna is already inserted). This is especially important if you regularly land your plane nose-first into the ground.
Troubleshooting & FAQ
My antenna’s base is larger than 3mm.
It isn’t compatible — the fairing captures cylindrical bases up to 3mm only.
My antenna’s base is small and fits loosely.
You can generally push the antenna further into the fairing to solve this. Otherwise, add a piece of the included heat shrink to shim it snug (works for bases up to 3mm).
The fairing feels loose on the bare antenna (no cylindrical base).
Add heat shrink to build up the fit, then seat and bond as usual.
My antenna is longer than the fairing.
That’s expected, as some 2.4GHz antennas are longer than others (the silver part). Use the included heat shrink (smallest size) to cover and protect the portion that extends past the 23mm fairing by just pushing it into the fairing opening (no heating required). See below.
Do I glue anything on the outside of the plane?
No. All adhesive stays inside the fuselage on the mounting tab — the exterior shows only the smooth fairing.
Can I remove or replace a fairing later?
Yes. Cut the old fairing free and clean the adhesive from the inner wall, then install a new fairing the same way. A CA debonder (cyanoacrylate adhesive remover) makes this job easier.
Questions?
Contact us — we’re happy to help. Additional kits and replacement fairings are on the Whisker Fairings product page.