Angle Lab User Guide
Your guide to understanding and optimizing your RC sailplane's wing setup.
1. Introduction
Welcome to Angle Lab!
Angle Lab is a web-based tool designed to help radio-controlled sailplane modelers conceptually explore and compare how changes to wing dihedral angles and geometry affect key flight characteristics. It provides instant visual and data-driven feedback, making it easier to understand the complex interplay between different parameters of your wing setup.
Who is this For?
This tool is primarily aimed at F5J pilots, thermal duration soaring enthusiasts, and any RC hobbyist interested in the aerodynamics of polyhedral (multi-panel) wings. Whether you are looking to optimize an existing model or simply learn more about aerodynamic principles, Angle Lab is for you.
What this Tool Is (and Isn't): Angle Lab is a powerful tool for relative comparison of two wing configurations and the understanding aerodynamic concepts. It is not a substitute for rigorous computational fluid dynamics (CFD) analysis or a flight-critical design tool. Always use sound judgment and expert advice when modifying aircraft.
2. The Angle Lab Interface: A Quick Tour

The application is split into two main areas to provide a clear and efficient workflow.
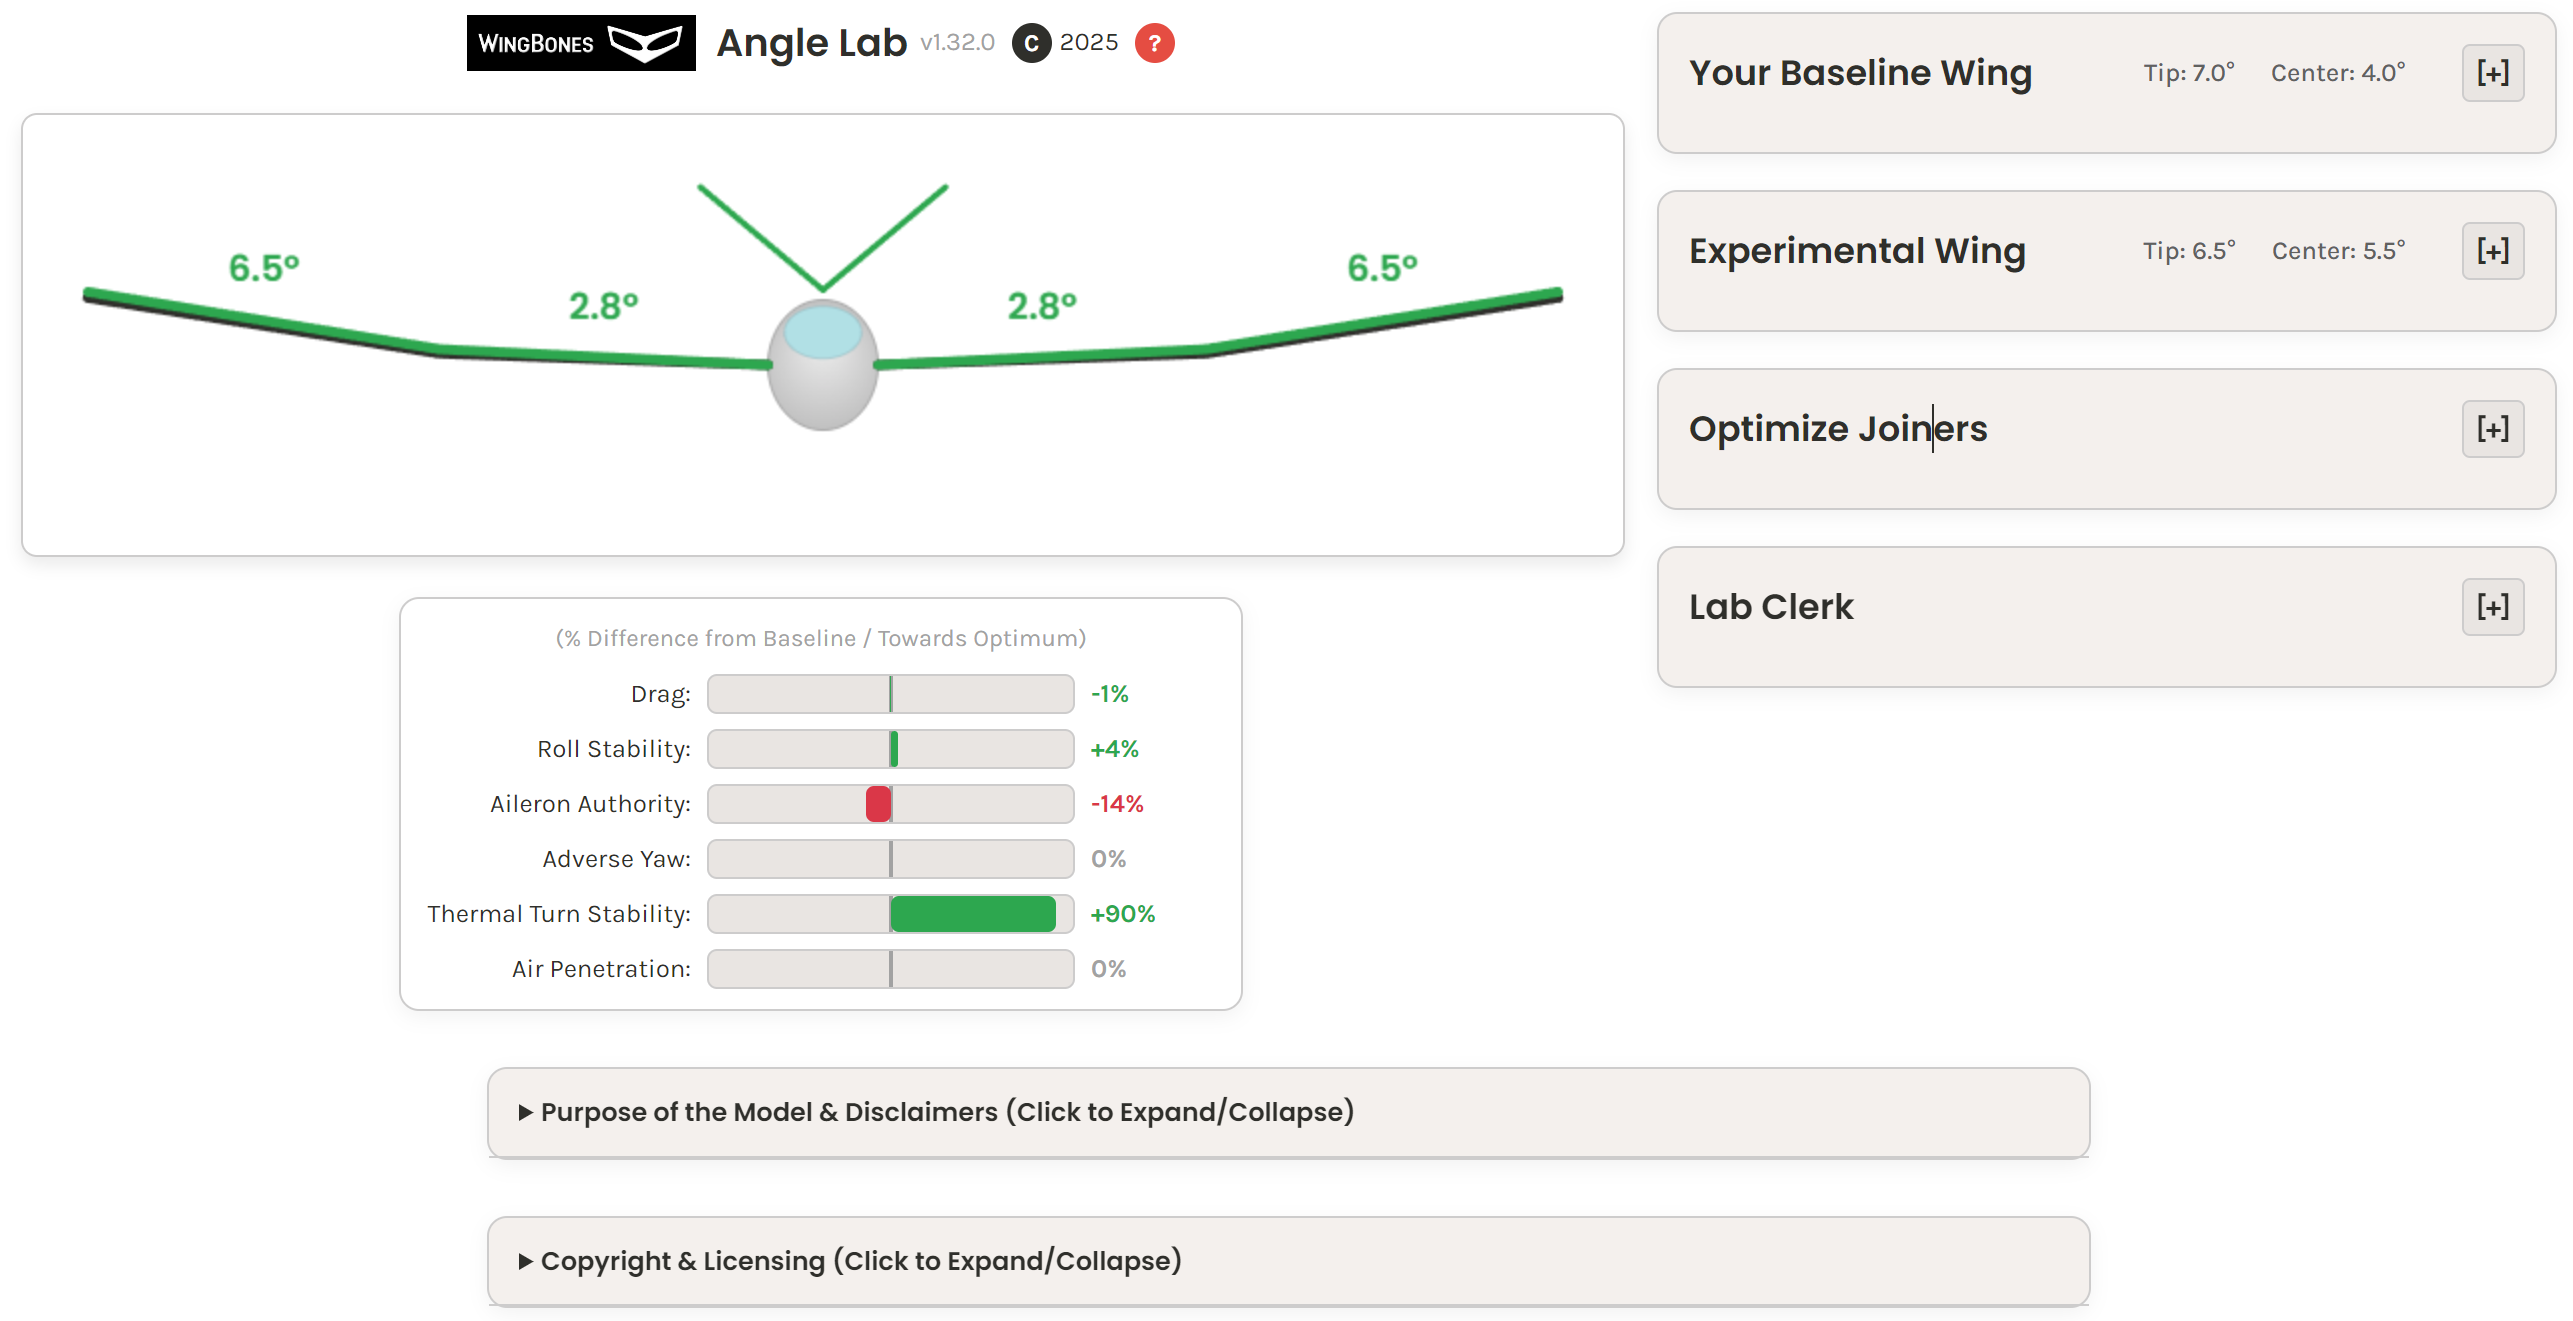
- Diagram Column (Left): This is the visual heart of the app. It shows a dynamic front profile of your wings, fuselage, and joiner/dihedral angles. Below the diagram, you'll find the Performance Indicators. Note that the wing changes color according to drag and the tail changes color according to thermal turn stability.
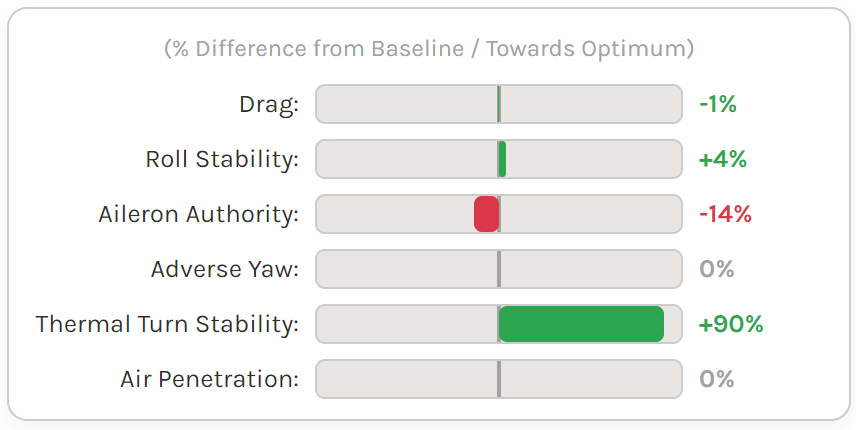
- Performance Indicators (Left): This dashboard provides real-time percentage feedback on how your Experimental Wing compares to your Baseline Wing.
- Configuration Column (Right): This is where you input all the data for your experiment. It contains panels for your Baseline setup, your Experimental setup, the Optimizer, and the Lab Clerk (save/load experiments, print a report, reset the experiment).
3. Your First Experiment: A Step-by-Step Walkthrough
The best way to learn Angle Lab is to jump right in. Follow these five steps to run your first comparison.
- Set Your Baseline: Open the "Your Baseline Wing" panel. Enter the parameters for your current wing setup (or a known model you would like to compare). This will be your reference point.
- Create an Experiment: Open the "Experimental Wing" panel. The easiest way to start is by clicking the ↺ Copy Settings from Baseline button. This creates an identical copy of your baseline wing to modify.
- Make a Change: Adjust one parameter on the Experimental Wing. For example, use the slider to increase the "Tip Joiner Angle" by a few degrees.
- Observe the Results: As you change the value, you'll see the blue "Experimental" wing diagram update instantly. Look at the Performance Indicators below the diagram to see the calculated effect on Drag, Stability, and more.
- Save Your Work: Navigate to the "Lab Clerk" panel. Give your experiment a name in the "Experiment Name" field (e.g., "8-degree tips test") and click the Save Experiment button to download the setup as a file.
4. Deeper Dive: Understanding the Features
4.1. Performance Indicators

This dashboard shows the percentage difference in performance of your Experimental wing relative to your Baseline wing. For "Thermal Turn Stability," it shows the improvement toward an ideal target value. Here’s what each indicator conceptually represents:
- Drag: An estimation of relative wing drag. Lower is generally better.
- Roll Stability: The tendency of the aircraft to self-level from a bank. Higher values indicates stronger self-leveling.
- Aileron Authority: The responsiveness of aileron roll control. Higher values indicate greater roll response for a given aileron deflection.
- Adverse Yaw: The tendency of the nose to yaw away from a turn. Lower is generally better, indicating less need for rudder correction.
- Thermal Turn Stability: Ease of maintaining a consistent bank angle in a thermal. Higher positive values indicate better performance compared to a baseline. Optimizing further may trade off other metrics if the baseline is already near ideal.
- Air Penetration: Efficiency when flying into wind, driven by wing loading and drag. Higher is better. Aircraft weight impacts this more than wing joiner angle adjustments.
4.2. Configuration Panels
- Your Baseline Wing: This is your starting point or "control" setup. Input all known parameters here, including geometric data and weight. If your wingtips have an extra upswept angle molded into them (like on some F5J models), check the "My wingtips have an additional dihedral" box and enter the additional angle and length of that section.
- Experimental Wing: This is your "test" setup. Make changes here to compare against the baseline. By default, its geometry is locked to the baseline. To modify the wingspan, chord, etc., check the Modify Wing Geometry.
- Optimize Joiners: Let the app suggest an optimal setup for you. First, select an Optimization Profile (currently F5J / Light Thermal Soaring). Then, use the Priority Slider to tell the assistant whether to prioritize headwind penetration or stability in thermals. Finally, choose which Angle(s) to Optimize (Tip, Center, or Both) and click the button. Review the outcome of the optimization attempt on the performance indicators to understand any tradeoffs in wing performance. The optimizer is very conservative, so you may not find different results when moving the slider off of the "Balanced" setting.
Lab Clerk: Managing Your Experiments
This panel contains all the tools for saving, loading, and documenting your work.
- Experiment Name: Give your current setup a unique, descriptive name. This name is used for the `.anglelab` filename and appears on the printed report. It is also displayed under glider diagram.
- Save/Load Experiment: Use Save Experiment to download a file containing all your settings (baseline, experimental, optimizer, and notes). Use Load Experiment to load a previously saved file.
- Print Results: Generates a clean, printable summary report of your comparison, including all parameters, performance indicators, and your lab notes.
- Lab Cleanup: This button resets the entire application to its original default state and clears the saved session data from your browser. A confirmation prompt will appear to prevent accidental data loss.
- Lab Notes: A free-form text area to record your thoughts, flight test results, weather conditions, ballast changes, or ideas for the current experiment. These notes are saved with your experiment file and included in the printout.
5. Practical Examples & Workflows
Use Case 1: Optimizing an Existing Glider
You have a glider and want to see if different joiners could improve its performance for light thermal flying.
- Enter your glider's exact wing specifications (span, chords, weight, current joiner angles) into the "Your Baseline Wing" panel.
- Go to the "Experimental Wing" panel and click ↺ Copy Settings from Baseline.
- Go to the "Optimize Joiners" panel. Set the Priority Slider to favor "Balanced" (recommended) or another setting.
- Click Suggest Optimal Angles. The app will update the Experimental Wing's joiner angles.
- Review the Performance Indicators to see the calculated improvements.
- Go to the "Lab Clerk", name your experiment "My Glider - Thermal Setup", add some notes, and click Save Experiment.
Use Case 2: Comparing Two Different Joiners
You have two sets of tip joiners for your model—a 6-degree set and an 8-degree set—and you want to see a direct comparison.
- Enter your wing's specs into the "Your Baseline Wing" panel, using 6.0 for the "Tip Joiner Angle".
- In the "Experimental Wing" panel, click ↺ Copy Settings from Baseline.
- Now, change the "Tip Joiner Angle" in the Experimental panel to 8.0.
- The Performance Indicators now show a direct, one-to-one comparison of the 8-degree joiners relative to the 6-degree joiners for your specific aircraft.
6. Important Notes & Disclaimers
Automatic Saving: For your convenience, Angle Lab automatically saves your current session in your browser's local storage. The next time you visit the page, you can pick up right where you left off. To start completely fresh, use the Lab Cleanup button in the Lab Clerk panel.
Model Limitations: Please remember that this tool is for illustrative and educational purposes. The calculations are based on simplified aerodynamic models. For a full list of assumptions and disclaimers, please refer to the "Purpose of the Model & Disclaimers" section at the bottom of the main application page.
